Showing posts with label vanagon. Show all posts

22 November 2015

Propex


Found myself in a position of having a late fall fishing derby with the scouts.

Convenient, as I had a chance to fully test the Propex system.   In one word - WOW!

When I finally checked out after midnight, the Scouts still going strong, I crawled into the back of the Thingamajigger and turned on the Propex.  It was 30 degrees outside, and within minutes the van was a comfy temp.  It was just me, so I did not have the top up.

During the night I needed to turn the heat down, as I had it too high to compensate for the cool start and myself needing to thaw out.  The Propex was maintaining too warm a temperature within the Thingamajigger.  Once I did, the unit kicked on and off as needed to maintain a perfect temperature.

What a great addition to the van!


21 June 2015

Wheel skins

Can't remember if I ever mentioned the Wheelskins product?

There are a couple types, different sizes for the different sized steering wheels on the various years. It's basically a leather cover for the wheel that improves the feel of the wheel as you drive.  
The installation takes about an hour, and I found easier once I took wheel off to do outside of the van.  There is a 'thread' that needs to be used in order to pull the skin taut.

Gloves help.  The thread they provide is a synthetic and can cut into your hand when you are trying to pull the skin taut.

I had one on the brown wheel for the last couple years.  


And with a swap over to the black dash, I covered the black steering wheel as well.


18 June 2015

Fuel tank swap

A couple weeks back I engaged in a fuel tank swap.  My tank has always had a concave dent in it from a previous owner, and although aesthetics under the van don't matter squat to me, the loss of a gallon of volume does.

Additionally, the sender was way off and required adjustment.

So I bought a new tank, with a new sending unit. I also bought the sealing kit from KBS coatings.

Started the sealing process as per instructions: by cleaning out the inside of the tank.  The tank comes with a coating of oil to protect during storage.  With the cleaner inside, and all the holes covered with duct tape or plugs, I needed to shake the tank around for a bit to ensure proper removal of all the yuckies.

Next step was to clean it out with water to neutralize the cleaner.

Then the second canister of liquid is added.  It is an etching liquid that after an hour of rotating the tank around every 5 minutes left the tank looking like this:


Another washing with water and the tank needs to completely dry.  Blown out with compressed air, and left to sit overnight and following day in the sun.  

Then it was game time - the next step was the sealer.  It is a self activating coating that reacts with air.  Instructions state to pour the entire can into the tank and begin slowly twisting tank around for an hour or so to get sealer into all the crevices.  

If you do it too quickly, the introduction of air bubbles will compromise the integrity of the sealer.  This is a pain in the ass, or shoulders as to do this every 5 minutes or so is going to make you sore.


After an hour, I had to drain off the excess sealer from within the tank.  I also started the introduction of air into the two lines that exit the bottom of the tank.  These lines need to be repeatedly blown through to ensure the sealer does not harden within and block the passage.  If it does, there is no removing it.  Game over.


During the first few hours of curing, the tank was rotated so that no pooling occurs.  Pooling will cause air bubbles to form as gasses beneath the outer layer get trapped, and as mentioned before, these bubbles will compromise your seal.

After about 5-6 hours of curing, and it is recommended to NOT do this in the sun, I strung the tank up from ceiling and cleaned the outside of the tank.  I had enough sealer left to coat the bottom of the tank, so I did.  Then I realized I probably had enough to coat the top of the tank, so I did.


Remember, you need to constantly be injecting compressed air into the feed, return and vent lines of the tank.  There is a screen at bottom of tank that will block easily if you do not blow off all the sealer coating.

Four days later, tank is fully cured and ready to install.

New rubber seals, all new fuel lines, blasted and painted the tank straps.


Pretty! Too bad no one will ever see it under there. 


Did something stupid

Earlier in week I was doing some maintenance on the thingamajigger when I noticed the passenger wiper arm was loose.  Instead of removing and cleaning out the teeth on the spindle shaft, I started tightening the nut.  Snapped the threads right off.

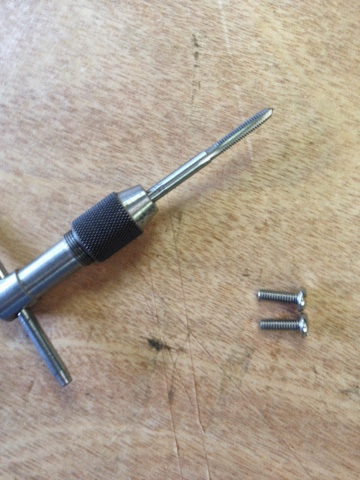
Immediately I ordered the replacement parts from Van Cafe, knowing that I could drill out the center, tap the shaft and repair that way, I chose the full replacement route.  Why, you may ask?

Because I have had a completed dash in the garage waiting for my busy ass to install anyway.  This gave a good reason.

So the tear out of the dash began Tuesday night.  Only took me about 20 minutes to tear down the dash and have access to the heater box, which also needs to come out to gain access to the wiper assembly.  


The bracket that the wiper motor attaches to needs to be removed as the other end is where the passenger shaft assembly is mounted.


You will notice the broken shaft, and that the assembly is peened into the bracket.  The new one will need to be peened into the bracket.  After wrestling with this for a few minutes, the new one was ready to be reinstalled.  Properly greased back up, with new rubber grommets at the body orifice, it was carefully reassembled.  

 My new dash needed to be completed.  The addition of my audio head unit, and a wiring harness to support the additional power outlets and new map light was built.  Had to swap the VIN plate and Aluh the hula girl.

The dash was carefully placed into position while all the connections were made.


Looks like colored spaghetti, but careful labeling on the disassembly allows for quick reassembly. I have had this dash out a few times, so my p-touch labels are permanent additions to my dash wiring.

Couple more bits to install: fuse box cover, glove box and the panel below the dash for heater vents.  I have a couple wires to run to my second fuse box.  The power outlets are marked as capable of 20amps, so I need to give them each a circuit and separate fuse.

Now the black dash is in, the steering column and the steering wheel (with a new Wheelskin).  The grab handles on pillars are black, as is the rear view mirror.  Transformation to black has begun.


23 April 2015

Shout out

Funny story
Was visiting my father today with my son, and on way back we noticed a Hobby shop that we had never seen.  Stopped in, and as I was checking out with my purchase a gentleman walks in and introduces himself as a reader of this blog.  He recognized the Thingamajigger and stopped to say hello.

Has an '85 weekender named Gertrude. 

Good to meet you John.  Enjoy your first night out this year (tomorrow)!

LP

15 November 2014

Parade

"To us in America, the reflections of Armistice Day will be filled with solemn pride in the heroism of those who died in the country’s service and with gratitude for the victory, both because of the thing from which it has freed us and because of the opportunity it has given America to show her sympathy with peace and justice in the councils of the nations…"  President Woodrow Wilson, November 1919

Thank you to all our Veterans!


Thingamajigger pulled the Cub Scout float in the Veterans Day parade last week. Followed by the Boy Scout Troop, the Thingamajigger supplied smiles, water and Thank You's to the veterans of our community.

29 October 2014

Silly stuff that bothers me

Did a little finicky tinkering today.

Why doesn't the yellow light work on the water level indicator when the red and green work fine? Bad connection.

What happened to the sound in my right rear upper speaker? Answer - I disconnected it because it was behind my child's head - time to reconnect.

Test fit the grey water tank. Had no instructions to determine which brackets and bolts go where?  Sure I could figure it out, but why turn a 2 hour job into 4 hours?  Called Bus Depot and they provided a link to pictures.

Tightened up the stove top so it will not rattle like it did.

My mirror in the closet came loose.  Needed to replace the support plastic tabs.

Installed the walkway trim piece I had in my garage.

Silly little stuff - but stuff that bothered me.

Spent some time relocating the summer time junk that was accumulating in the Thingamajigger's garage space. Getting to be that time of year.

Contemplated some pop top work and thought better of it.  No major projects before the Veterans Day parade as I am towing the float for my son's Cub Scout Pack.

18 October 2014

Grey water tank

Typical RV's have three types of water storage tanks - 1. Fresh water;  2. Black Water (toilet sewage) 3. Gray Water (sink sewage). While the black water tank is generally not built in to our vans, I felt that the grey water should be.  Have used a bucket in the past, but a nasty spill (and resulting cleanup) this summer got me thinking there had to be a better way.

Most states consider the water that drains from our Vanagons as sewage due to high concentration of solids. So what are the options?

There is the bucket method.  The water drains straight down through piping to empty out under the van into a bucket.  This requires a walk to the latrine, or a proper sewage dump station.  There are tanks that also provide a 'safer' version of transport. Generally wheels are attached. But venting needs to be considered as well.

Also, where do you store the bucket or tank on wheels?

There are collapsible tanks, that can be thrown out when they get too grungy.  But they tend to be too tall to drain directly into, requiring a tubing system to use.

Tanks. 
There are a few options here.  I have seen some on the Samba successfully modifying an older Bay window water tank to mount under the van.  I even bought one to do this, but then thought better of it.  I have also seen some make a tank out of 4 or 6 inch schedule 40 PVC.

Then I saw this little gem.  


Bought it with mounting kit. Little bit on pricier side, but it's made especially for this purpose by the factory.  Designed to work around your propane tank, it mounts up under the kitchen with its own mount kit.
 
Once I have a few moments, I will install it and add some pictures.

Bus Depot provided this link for the installation directions.  It is in German, but pictures are worth a thousand words, right?

http://www.vwbusshop.de/WebRoot/Sage/Shops/GuenzlClassicParts/MediaGallery/Anleitungen/Abwassertank_Joker.pdf


12 October 2014

Salem Massachusetts

at Halloween!  What a fun time.

Ran around the city taking in the Halloween frights.

Transporterfest was this weekend at the Lars Anderson Museum in Brookline.

Some of the participants found their way to a campground in Salem for some pre-show enjoyment.

Good to see all the usual folk (notice I make no reference to normal), and meet some new VW people.

LP

25 likeminded VW folk.


Lots of laughs, VW stories and such.


Sunrise over the cove at Winter Island


06 September 2014

Brake lines

One of my brake lines popped today on way home from NH.

Knew this project was coming - just did not expect the excitement of losing pedal.  Guess the brake kit and new suspension gets mounted this week.

Going to be a long week.

Update - after it stopped raining, and my undercarriage had the night to dry off I had a look at the leak under the van. Turns out I popped a caliper!  Of all the weak lines and points of failure, the last place I expected a problem was the 2 year old rebuilt calipers!

Ordered up a rebuilt one from Bus Depot to get through rest of season and then I will upgrade to new setup with all new lines, booster, et al.

31 August 2014

Best use for an IKEA towel rack

Found myself the owner of a towel rack from ikea.  No idea where it came from, it just showed up in my garage.  I was looking at it for a number of months before it hit me - the perfect use for that thing.


Attached it on loft shelf above my sandblast cabinet.  Out of way, but convenient as well.  Holds 12 rolls of varying gauge wire. 

Radiator baffles

In efforts to lower wind noise in the Thingamajigger, I thought I would try to add some OEM equipment into the van to alleviate some possible sources of noise.  The first was the radiator baffles.  I have never had any on the van.  If it were not for the Samba, I would not have know they existed. I don't remember them on earlier vans of mine.

Anyway - bought the Go Westy aftermarket version.  Nice pieces.  Some sort of recycled material.


First step was to remove the upper and lower grilles.  Also, you will need to drop your spare tire clamshell.  

Test fitting the pieces will ensure you understand the fitment before you start.

I started with the left baffle.  Used a stainless carriage bolt, washer and loc nut to hold lower portion in place.  Then adjusted the upper tab to fit in to cross support.  The upper tab is held in place with a push clip.  Mine were still in place from when original baffles deteriorated (or were improperly removed).  These clips need to be carefully pried up and pinched together to remove with out breaking.  


Next, I went for the lower baffle.  Upon looking underneath, I found the mount points on the radiator.


The 'newish' radiator has never had anything attached here.  I had some 1/2 inch 8-32 stainless screws in screw bin.  So I grabbed a tap and a tap handle and put some threads into the radiator mount.


Placing the baffle into place, and using a pair of stainless finishing washers, I secured the baffle into position.


Finally, the right side.  It's similar to the left, but without the same access.  You cannot reach up from underneath to tighten the loc nut.  On this baffle you need to reach in from the radiator side of the baffle to get a 1/4 in drive ratchet to secure the nut on the carriage bolt.  


Cannot really see them here, but they are there.

The other thing I am trying is to replace the functions of the grille air dam pieces that are also missing from my van.  I suppose the better option would be to just cave in and buy the South African grille as the space that I intend to block would already be covered by the secondary lighting.

I grabbed some pieces of lexan I had in my basement.  Cut them into exact opposite pieces for each end of the grill, drilled holes for clearance over the stock location pins. The 'heads' of these need to be carved off.  These were preened over with a hot iron to retain the original blocking baffles.

Once I had my pieces created and modified for clearance, I adhered them to the back of the grille with 5 minute epoxy. 


My only caution I have to state when doing this is to leave enough access to the bleeder screw on top of the radiator.  When I need to bleed the radiator, I never remove the grille as I can reach in with a 13 mm wrench and perform the bleed.  Too much of the new baffle would remove this easy access.

Now I shall go out and try the air flow and noise reduction.


24 August 2014

Jersey Shore

Thingamajigger found its way to the Shore this weekend. 

Very late decision to go.  Left at 7pm Friday.  Saw two on the way, and another down there. Passed a two toned early tintop on Rte 84. 

4.5 hours later, we were pulling into Point Pleasant.

Van ran well.  Transaxle was smooth and the shift was like a warm knife through butter.

Many compliments and questions on the van itself.


19 August 2014

Medic! Need a medic!

The hike I had with my kid and his Cub Scout friends got me thinking. (Uh oh)

I need a better med kit in the van.  The small generic box was fine for cuts and scrapes, but we are better than that - we are Scouts.  

I have a full Med bag that was graciously donated and will be maintained by a local Ambulance Service.  That does go on most all outings with the Pack. But what if I forget, or what if I have a couple kids who fall?

Needed a better kit.

Bought this kit online: Largest self contained box I can fit into the space I had planned. 


If there was one kit that was one inch smaller in height, it would be perfect. This one barely clears the hatch and I may have issue with curtain movement, but should be ok. 

Since I did not find it perfect - I did not want to perma-mount it, I used some high quality 3M double sided tape. 

Will give it a 6 month test. 

Also in this picture you can see my record system for maintenance and major component replacement. Available in one place, at a glance.  Also have listed my part numbers for preferred plugs, wires, belts and such.  Can't see it when door is closed. 

Works for me. 


16 August 2014

Propex

Just plunked down the coin for a Propex HS 2211 heat system from Karl at Westyventures.  He is the importer for these systems and I felt a better choice for purchase than the usual suspects.

With so much work (good thing as I can afford more bits for the van and bad thing because I cannot enjoy it) this year, I have not camped as much as I would have liked to and without adequate camp time, I will be unfulfilled going into the winter season making for an intolerable winter.

With a safe heat system, I will have option to camp much later and continue to wander well into late autumn - early winter.  Once there is snow the Thingamajigger goes away.

http://www.westyventures.com/HS2211%20flyer.pdf


12 August 2014

Transaxle

Given the length of time I had to wait on the transaxle, I was able to assemble the bits to do a proper install:
Powerflex bushing from T3 Technique, Swepco 201 lube, new clutch kit, shift linkage rebuild kit from Van Cafe, couple shift rod bushing boots / new shift rod bushing, and a new clutch slave cylinder.

With all the bits in hand, I propped up the van.

Inspecting underneath and I get to thinking (Warning - I suffer from a serious case of "while I am under there syndrome") I think that I should also exchange out my coolant pipes and since it's easier to do it with fuel tank partially dropped, and since I am going to do that I am going to adjust the fuel sender so it reads correctly.

So,with the Thingamajigger propped up at door to garage ( garage is too short to fit van in and jack it up the height I need), I started draining fluids.

Cleaned the floor of any debris that will catch the creeper, and then decided to put a half sheet of plywood there to aid movement.


After fluids were drained (coolant and fuel), I got to disassembling the transaxle from the engine.  With the Zetec setup, it is imperative to support the motor.  I used a custom cut piece of 5x5 PT that I have used before.  Was nice to find it again as usually my kid takes that sort of thing and 'creates' stuff.

Removed the shift shaft and mechanism (marking the placement of the shaft versus the clamp), removed the starter, removed the bolts for the CV joints, disconnected the clutch slave cylinder and then supported the tranny while I removed the three remaining nuts that hold the transaxle to the motor.  Then (with tranny supported) I removed the front transaxle mount bolts and ground strap from the body.

Carefully lower the transaxle a bit (too much and it binds - or worse, bends the studs the transaxle mounts upon).  Now you can start to wrestle the transaxle away from the motor.  Pull a bit, lower a bit, pull a bit and lower enough to clear trans mount.  Slid right off.  

The plywood came in handy to slide the old transaxle out easily.

Now with transaxle out, I slid under and assessed the rest of the plan.  I was able to sit up under the transaxle cavity and tear out the ancient matting that was still in a solid form, but the foam part was wet and it had not rained in a couple weeks.  Good thing the plastic backing was in tact as the metal behind it would have been rotted to hell if it was not.

With that gone, it brightened up the work area.

Made sense to drop the tank now.  Dropped the rearward side enough to spin out the sender and corrected the angle of the float (a best guess).

Then I got to pulling the coolant lines.  My coolant lines were really not that bad, as I know they were replaced about 13 or 14 years ago by prior owner Bill.  But my precautionary side got the best of me a few months back and I bought the stainless steel coolant pipes on sale from Rocky Mountain Westy.

Having them in the garage, and transmission out, it just made sense.  I was not trying to save the pipes for any reason, so I cut them in two pieces each and removed them.


Was a fairly straight forward installation.  I made sure to notice the bends in the old one and their position relative to the new ones and marked them with a sharpie. 

Within 30 minutes I had the new ones installed.  I used some rubber from a coolant hose to surround the SS pipes anywhere they may contact with body metal (abrasion resistance) and since I did not have a rear mount for the pipes, I fashioned one from some SS strapping and a piece of 1/2 inch fuel line slid over.  This I bent to appropriate position and used factory mount holes to support the rear portion of the pipes.  Also since I had all the coolant out, I also took the opportunity to re route the heater lines and tightened them up to the bottom of the body. Everything is close, tight and beautiful.

I though I took a picture, but I will have to get back under and take another.

Next was to prep the transmission for installation.  The older mounts had to be removed off the old transaxle and all the periphery stuff as well.  The front mount needed to be further broken down to remove the metal sleeved rubber mount.  No matter what configuration I tried, I could not get it to work in the press.  

Went old school - hammer, chisel and a vice.  Drilled through the rubber in order to provide clearance to thread a hack saw blade through.  I cut through the outer metal sleeve in two places to relieve the outward pressure and hammered the bushing right out with chisel.

I pulled it all, cleaned up with degreaser and did them up in the sandblaster.


In the picture you will see the clutch slave cylinder mount, the clutch actuator arm, the front transaxle mount (two pieces).  

While those dried, I started disassembling the shifter linkage arm.  Removed the pin that hold the lever arm on the shaft and then removed the lever itself.  This needs to come off in order to replace the bushing.

Here you can see the condition of the bushing and the housing.


These pieces got degreased and then popped into the sandblaster.  Painted and set to dry, my transmission mounts were dry to touch.  I built the transmission mount with the new Powerflex bushing and attached it to transaxle.  Slid the clutch slave cylinder brackets on the transaxle and then the actuator lever with its circlip.


I found the rearward slave cylinder support bracket on ground so I needed to repaint it, so it's not in this picture.  But you can also see the rebuilt shifter arm in the foreground.  

Here it is again with some chrome button head bolts as I could not find the stainless ones I bought and I do not consider it an issue here. Painted that as well, although in New England this sort of thing does not last long. Even powder coating does not last long - one chip and the water gets in and it rusts underneath. C'est la vie. 


So now that I had the new clutch installed and new support bearing, it was time to install the transaxle.  Remember to fill your transaxle prior to installation, it's just easier.  Current VW board suggestions are to use the Swepco 201 for applications under 150hp, and Swepco 210 for over 150 hp. There are huge debates over this no matter what vehicle forum you peruse, I went with what Rancho suggested.  

Slid it under on my creeper and rolled it off.  Got it lifted into place with assistance of a floor jack and got it up there with some more wrestling around.  

Installed transaxle, time to reinstall the starter, shift linkage, new slave cylinder, all the mounts, CV joints, Zetec specific speed sensor, ground strap, etc.

In this photo you can see the next project - resealing the HC oil pan.  Will do when I perform next oil change. I was also grabbing tools to connect the CV joints here, and grease to repack the joint.


Transaxle installed, connectors all checked for proper torque, I went to cooling system and checked all those connectors and clamps, then reinstalled my fuel tank.  Time to check for leaks. 

Filled with coolant and refilled my fuel.  Fired right up and shifter worked, but was finicky.  Assumed that due to my 'new' parts, I would need to play around with adjustment. Took me a half dozen tries to get it where I was somewhat pleased.  Still think it needs additional adjustment. Will use a bit and correct after break in period.


09 August 2014

02 August 2014

Today's adventure

Started at a Limbo members house. A number of VW folks gathered there last night for a night of fun prior to today's Volks Fair in Shrewsbury MA.


Even a few Vanagons on a trailer destined for Virginia based collector who has over 400.

Headed over to show site. Helped do some set up and watched the cars roll in


This white 67 was my favorite of the show.

Then it was time for some fun with my kid


Bought him a kayak last year, just gave it to him today as I felt his swimming skills were good now.  He took to the kayak immediately and was paddling quite well.  Slid the kayaks back into the van (on a tarp) and headed for home.

Good day in the VW.


06 July 2014

Mohawk Trail

Enjoyed the van this weekend instead of tinkering.

Went to pick up my kid at Camp Mujigae - Korean Culture camp in Albany.  On way back we camped in Western Massachusetts.

Setting up camp.


Actually, I set up camp - he plays.

And plays


And plays some more. 


Then he built us a fire, and we ate dinner.  Made s'mores. Have taught him well, little bugger knows how to perfectly caramelize a marshmallow.


Following morning, after fishing for a bit and then some breakfast, we drove up Mount Greylock. At 3491 feet, it is the tallest peak in Massachusetts. 


So after taking this picture I threw up my hands and ran flailing my arms singing "The hills are alive with the sound of music".  A few of the older folks got a laugh out of it.  My son wouldn't speak to me for a few minutes - I had embarrassed him.  I tell him it's my job, just wait until prom and I am a chaperone!


Drove home along the Mohawk trail.


Have a second job lined up for the winter: