In efforts to lower wind noise in the Thingamajigger, I thought I would try to add some OEM equipment into the van to alleviate some possible sources of noise. The first was the radiator baffles. I have never had any on the van. If it were not for the Samba, I would not have know they existed. I don't remember them on earlier vans of mine.
Anyway - bought the Go Westy aftermarket version. Nice pieces. Some sort of recycled material.
First step was to remove the upper and lower grilles. Also, you will need to drop your spare tire clamshell.
Test fitting the pieces will ensure you understand the fitment before you start.
I started with the left baffle. Used a stainless carriage bolt, washer and loc nut to hold lower portion in place. Then adjusted the upper tab to fit in to cross support. The upper tab is held in place with a push clip. Mine were still in place from when original baffles deteriorated (or were improperly removed). These clips need to be carefully pried up and pinched together to remove with out breaking.
Next, I went for the lower baffle. Upon looking underneath, I found the mount points on the radiator.
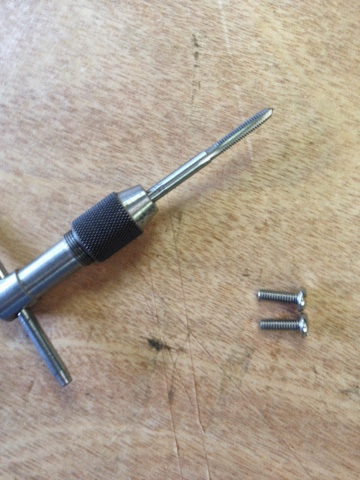
The 'newish' radiator has never had anything attached here. I had some 1/2 inch 8-32 stainless screws in screw bin. So I grabbed a tap and a tap handle and put some threads into the radiator mount.
Placing the baffle into place, and using a pair of stainless finishing washers, I secured the baffle into position.
Finally, the right side. It's similar to the left, but without the same access. You cannot reach up from underneath to tighten the loc nut. On this baffle you need to reach in from the radiator side of the baffle to get a 1/4 in drive ratchet to secure the nut on the carriage bolt.
Cannot really see them here, but they are there.
The other thing I am trying is to replace the functions of the grille air dam pieces that are also missing from my van. I suppose the better option would be to just cave in and buy the South African grille as the space that I intend to block would already be covered by the secondary lighting.
I grabbed some pieces of lexan I had in my basement. Cut them into exact opposite pieces for each end of the grill, drilled holes for clearance over the stock location pins. The 'heads' of these need to be carved off. These were preened over with a hot iron to retain the original blocking baffles.
Once I had my pieces created and modified for clearance, I adhered them to the back of the grille with 5 minute epoxy.
My only caution I have to state when doing this is to leave enough access to the bleeder screw on top of the radiator. When I need to bleed the radiator, I never remove the grille as I can reach in with a 13 mm wrench and perform the bleed. Too much of the new baffle would remove this easy access.
Now I shall go out and try the air flow and noise reduction.