Showing posts with label body preparation. Show all posts

23 April 2012

Drivers strip

Got some stripping done yesterday.  More chemical stripping for the centers of the panels as any sandblasting in the center of the panels has the potential for warping the panels.


So even though it was raining like crazy, I did get to spend some time with the chemicals.


I did get a bit further than this photo shows, but not quite done with this panel.  Once this panel is done, the stripping of the sides will be complete.  I will only have some work on the roof panel to complete and I will probably do that mechanically so as to not disturb any primer work already completed and not ruin my canvas any more than it is. 

I would like to replace the canvas this year, but right now I have more important things to do on the van - bodywork, paintwork and suspension come to mind.  Would also like to do the metal lines on the underside of the van for the brakes, clutch and fuel.  And with the new engine coming . . .

07 April 2012

Today's activities

Given that tomorrow is Easter and I wont get any garage time, I went a bit overboard today.  Feeling it right now too. 

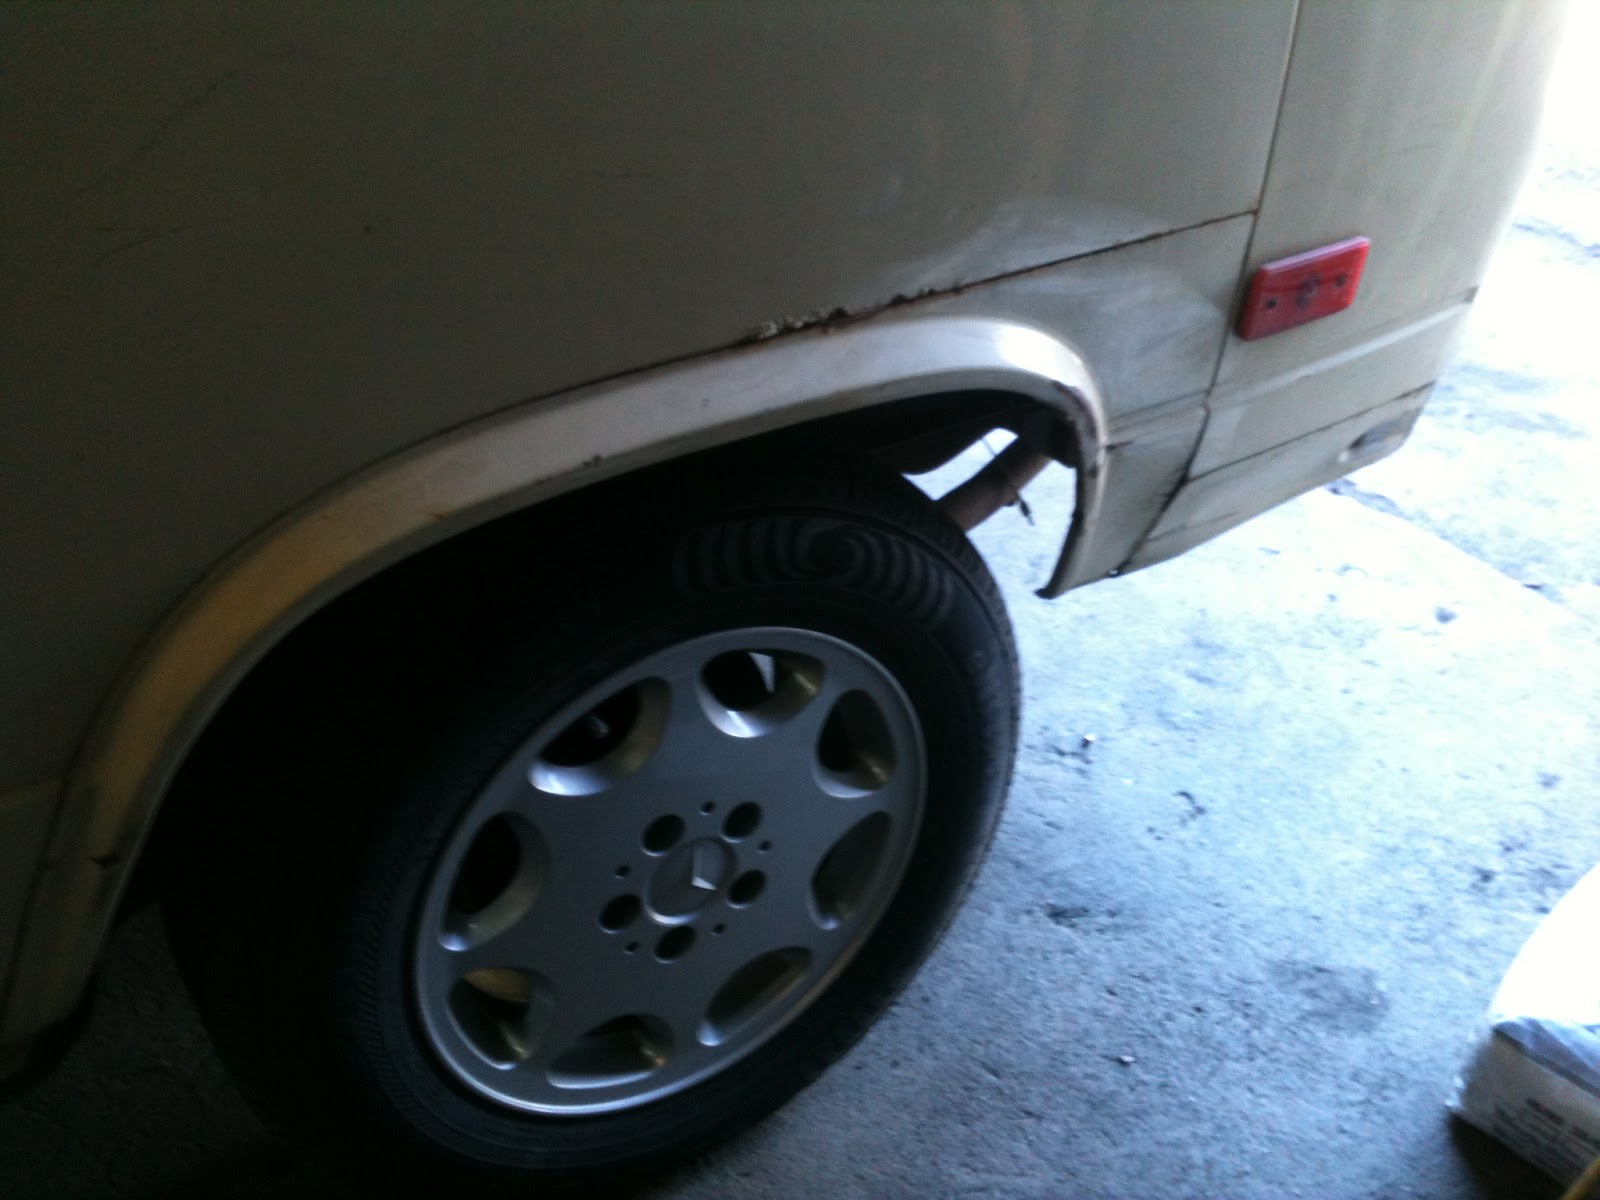
Getting dried out with all this sandblasting.  Feel like a piece of parchment right now.  Spent the day prepping the drivers side for subsequent work.  Having done the passenger side, I was able to anticipate sandblasting needs and went to town.


The before photos.  My seam rust is evident here.  Dinged up wheel arch and wonky rear corner panel.
The seam rust on the vertical seam and the lower horizontal seam.  Typical stuff for a nearly 30 year old Vanagon.

Not for long.

Overall, it is really not that bad.


Stripped off the 'removables' - the flue vent, water/elec hookups, side marker light and the wheel house and rear corner panel.


I know its technically not a removable, but to day it is!  Used the whizzer and three cut off wheels to get it to this point. 


Then, cutting the inner wheel house within 5/8 in from the outer edge.  Hammer and chiseled off the remaining piece of old wheel arch.  Left me with this point.


Started with the sandblaster towards the front of the van and worked my way back.  All seams got blasted, whether they needed it or not.  All of the lower panel got blasted too, expecting that I will need to do some work there.


Did the side panel, all seams, flue vent, hookup mount holes.


All of the mount edges for the new wheel arch were done, as was any spot on the van that looked suspect, or would be hard to chemically strip.

That brought me back to the front.


I also did the frames of the windows (slider and rear) in the same fashion I did yesterday; by cutting off a portion of the rubber moulding to allow access.


When I did that, I found this.  Someone has been in here before. 

Not going to be able to work on it for a day or two, work getting in the way.

06 April 2012

Priming the body

Finished the welding on the passenger side.  Had a couple small pin holes at the bottom of the B pillar and C pillar.  Cleaned them up nice and then sandblasted to get rid of any and all residue or welding slag.

Started taping things up and got to thinking about the rearmost side windows.  In truth, I have been battling in my head on the proper way to deal with them (which is to remove them) versus wanting to keep as much crap out of the van as possible.  I solved this dilemma today.

What I decided to do is to carefully carve off the outer edge of the rubber moulding.  I left just enough to secure the window in place but allow for access deep into the window orifice.

The picture on the right shows the difference in access between where I had sandblasted yesterday right up to the edge of the rubber moulding, and the additional access provided by carving up the moulding.

As you can see, the window still stays in place just fine.  I sandblasted the window frame when I did the lower welded spots.

Looks good, and I am sure (and pleased) of the condition under the moulding.  Now the epoxy primer has been laid, across the whole passenger side up through the raingutter.


Does not look like much without all the add on parts and the doors, and it has taken me too long to get to this point, but we are progressing.

03 April 2012

More body prep

Sanding, sanding, sanding.  Pulled the slider door gasket out (ordered a new one) and stripped as much as I could mechanically in the slider door jamb.  Rest will have to be done with sandblaster.

Also ordered new sliding window gaskets (without chrome insert) and a new windshield gasket.  Already have the rear side window gaskets, and the kits to rebuild the front doors.

Hoping to have the entire passenger side done by Friday - blasted, final touch up welding and primed.  Want to turn van around and get going on drivers side.  Not enough room to work on both sides in my garage. 

Still trying to figure how I want to tackle the roof.

Casa Magna cigar (Diadema) helps to relieve the stresses while I work.  Nice smoke.

01 April 2012

Finished the nose

Today I was able to spend some time and finish the nose panels.

The asphalt shingles inserted in the front end are to protect the radiator from sandblasting media.

Finished up the welding.  ground it smooth as possible and sandblasted it clean.  Also cleaned up the new bumper panel, the air intake and prepped the bumper support itself for priming.


Now the nose is complete, with all its metal work.  It will require the high build primer next, and then any bodywork.

Quite a difference?


Also started on the slider door.  Got it removed, gutted and ready to put on a stand to strip it.  I was having such a difficult time with it hung.  Too many coats of paint, just easier off the van.

Will be better this way anyhow.  I will be painting all the doors off the van, so I can also paint the door jambs.  With the square off edges of the front door's design it will be easy to tape them cleanly, and the rear hatch and slider are easy as well, so why not paint them off the van?

23 March 2012

Doors revisited

So after getting the doors ready:

That is stripping exterior with chemical stripper and interior with media blaster.  Then cleaning up to remove residue, spraying Metalok by Dupont (epoxy primer), and on the exterior a high build primer for blocking out.  The doors were then sprayed.


I had a friend squirt the paint.  The booth made it easy and clean.  They were about to be baked when the picture was taken.

The paint choice was Dupont's Imron, a high strength paint that will stand up to years of abuse. 

Code L567 Ivory as stated in prior post.

Following picture is the tint codes to make the color in Imron