24 February 2012

Rust work

A bit more rust work in past couple days.

Upon sandblasting, a little spot of rust/rot emerged.  Funny place for it - the large rectangular shaped hole on right of picture is the mount hole for the left bumper support.


So I cut it out, and welded in a replacement.


Finished sandblasting the rear panel, all the nooks and crannies are clean.  The bottom of the valance is clean.  The areas around the vent squares are beautiful, and now with a bit of tapping they are straight again.

The front panel took some more time today as well.  I am fitting it up, and ran into more bodywork than I would have wanted on the drivers corner.  Have to decide whether to bang it out proper, or replace it with a cannibalized panel from another van.


Some of the bodywork can be seen here in this picture.


Also, since I had spot blaster out, I took care of the funny little oxidation spots I had eluded to in an earlier post.  The spot blaster died when it blew through a nozzle and would not suck up any more media sand.  Really need to get another sandblaster soon, I have ALOT of blasting to do. 


20 February 2012

Wheel arch revisited

Was playing with the passenger wheel arch.  I know this will require many pictures, and I just have not taken any yet.  Too busy trying to get something done.  I will get some tomorrow night when I am playing again.

Please keep in mind that every van will be different.  My van's panel was destroyed in an accident and half ass repaired, not rotted out so the majority of my panel was in good to very good condition.  My repair was based on this and yours may be different.  I anticipate my driver's side to be worse.

After cleaning up the remaining pieces of the former wheel arch so I wont cut my hand to shreds, I started prepping the area by grinding out the old spot welds.  By doing this, I was able to separate the outer panel from the remaining piece of wheel arch that also forms a large portion of the inner rear wheel well.

What I decided to do is to clean up the edge, use a cutting wheel to cut just inside the wheel well at the tab from the upper panel.  I gave myself a 1/8 inch working space in order to fit the new panel in between the older panel and the tab of the upper panel. 

The new panel I trimmed to have a 1.5 inch tab to insert between said panel pieces.  I worked the new panel into place, starting in the front (tried it the other way, was not going to happen), and using a couple screwdrivers to flex open the panel pieces as I slid the panel into place a little bit at a time.


I am not too disappointed with the panels dimensions, but ALL aftermarket panels will need some massaging to work correctly.  I have this panel into place to determine what 'massaging' will need to take place to ensure all body lines are correctly lined up.

I also want to sandblast the seam completely (inside and out), punch spot weld holes holes in new panel and work the fitment a bit better


The rear lower corner panel needed little altering, but it fits well and will look even better.

A word of note - the undercoating in the wheel well is thick.  Not only that, it is flammable.  The grinder had it going pretty good, so be careful.  ALSO - make sure before cutting into the upper panel that you have removed the fiberglass insulation and have blocked the path of sparks and hot metal from finding something to smoulder within.  I used pieces of roofing shingle - cheap, accessible and easily placed / removed.

19 February 2012

A little tail?

So I have been stripping the rear tail piece while I am waiting on a contractor neighbor to bring me the sandblaster.  He stopped me from buying one a few weeks back, and now he is taking forever.  I have the small one, but I need a big heavy duty one for all the jobs I have going.

So anyway, back to the tail piece - The panel that surrounds the taillights and is beneath the hatch.


This is the panel when I started stripping it.  As I have gotten closer to a clean panel, I have found more subsurface rust.

This is what it looks like today.


There are some rusty spots, particularly around the tail light mount clips, the screw holes that held the license plate bracket on, and the very bottom of the panel beneath the 'vents'.

Will require the sandblaster.


Someone gave me a box of these Bohemian cigars.  They are a bit too dry and I have had them in a very humid environment trying to rejuvenate, but they are still a bit dry.

Too bad too, they are milder than I generally prefer, but the size makes them perfect for a quick smoke in the garage.  Many times the smoke, the fumes from primer and the smell of the chemical stripper gets to be too much. Not enjoyable, and I end up putting the cigar down in favor of getting some work done.

Been training for the Tough Mudder anyway.  Should cut back on my cigar usage.


11 February 2012

Bits and pieces

Met up with a used parts guy I have been getting some good stuff from lately.

He has a few Vanagons at his place, and a rotted out Westy that he has thus far refused to part out.  Bummer, I like the seats.

Anyway I got me a map door pocket for the passenger side, a spoiler for under the front bumper (yes still using the steel bumper), a new license plate door, front door seals (the ones that attach to pillar and seal door space from wind noise), couple headlight buckets (testing out a theory) and a brown grab handle for the drivers side pillar.  Still waiting on the radiator surrounds, and some new brown front door handle surrounds.

Earlier in the week I received some seat belt covers for the front belts, and yesterday I received my passenger side rear arch panel that had been backordered since October.

Time to tinker again.

Nose panels

So with all the pain on the nose stripped off, and the body filler used by the PO's body shop to hide the rust in the infamous nose panel removed, we can see what we are dealing with.
The ends do not look too bad.  You can see where the body shop used a whizzer to grind away seam rust, and then coated with body filler to hide it.  I am of the school of thought that it is better to remove the offending panel.
Ahhh, there is the start of the rot.

And there it is in all its pure unadulterated ugliness.

I used a whizzer and a sawzall to 'carefully remove the metal at the base of the inward angle of the upper panel.  Then a hammer and chisel to remove the spot welds and material on the bottom of the bumper support.

I have the new panel, and will need to do some grinding to remove the remainder of the spot welds, and then some sandblasting to get a good clean surface to weld the new panel.  BTW, the new panel was purchased from Bus Depot, but I have also seen them listed at CIP1.

More photos when I do the install.

06 February 2012

More delays

OK, so its been a busy week.  Spent a week at the Bocuse d'Or for the USA finalists. Top Chef goes to Lyon France to represent the USA in international culinary competition.  A US Chef has NEVER podiumed in the 22 years of the competition.

Good thing I wear aprons when around kitchens, cause I was sporting some serious culinary wood.

The few things I was able to accomplish:
Finished prepping the side panels for primer.  Spot blasted the few necessary oxidation spots and sprayed a cheaper primer on for temporary reasons.  The metalok primer was too cold to mix and my garage was too cold to spray.  Also realized a problem has surfaced.

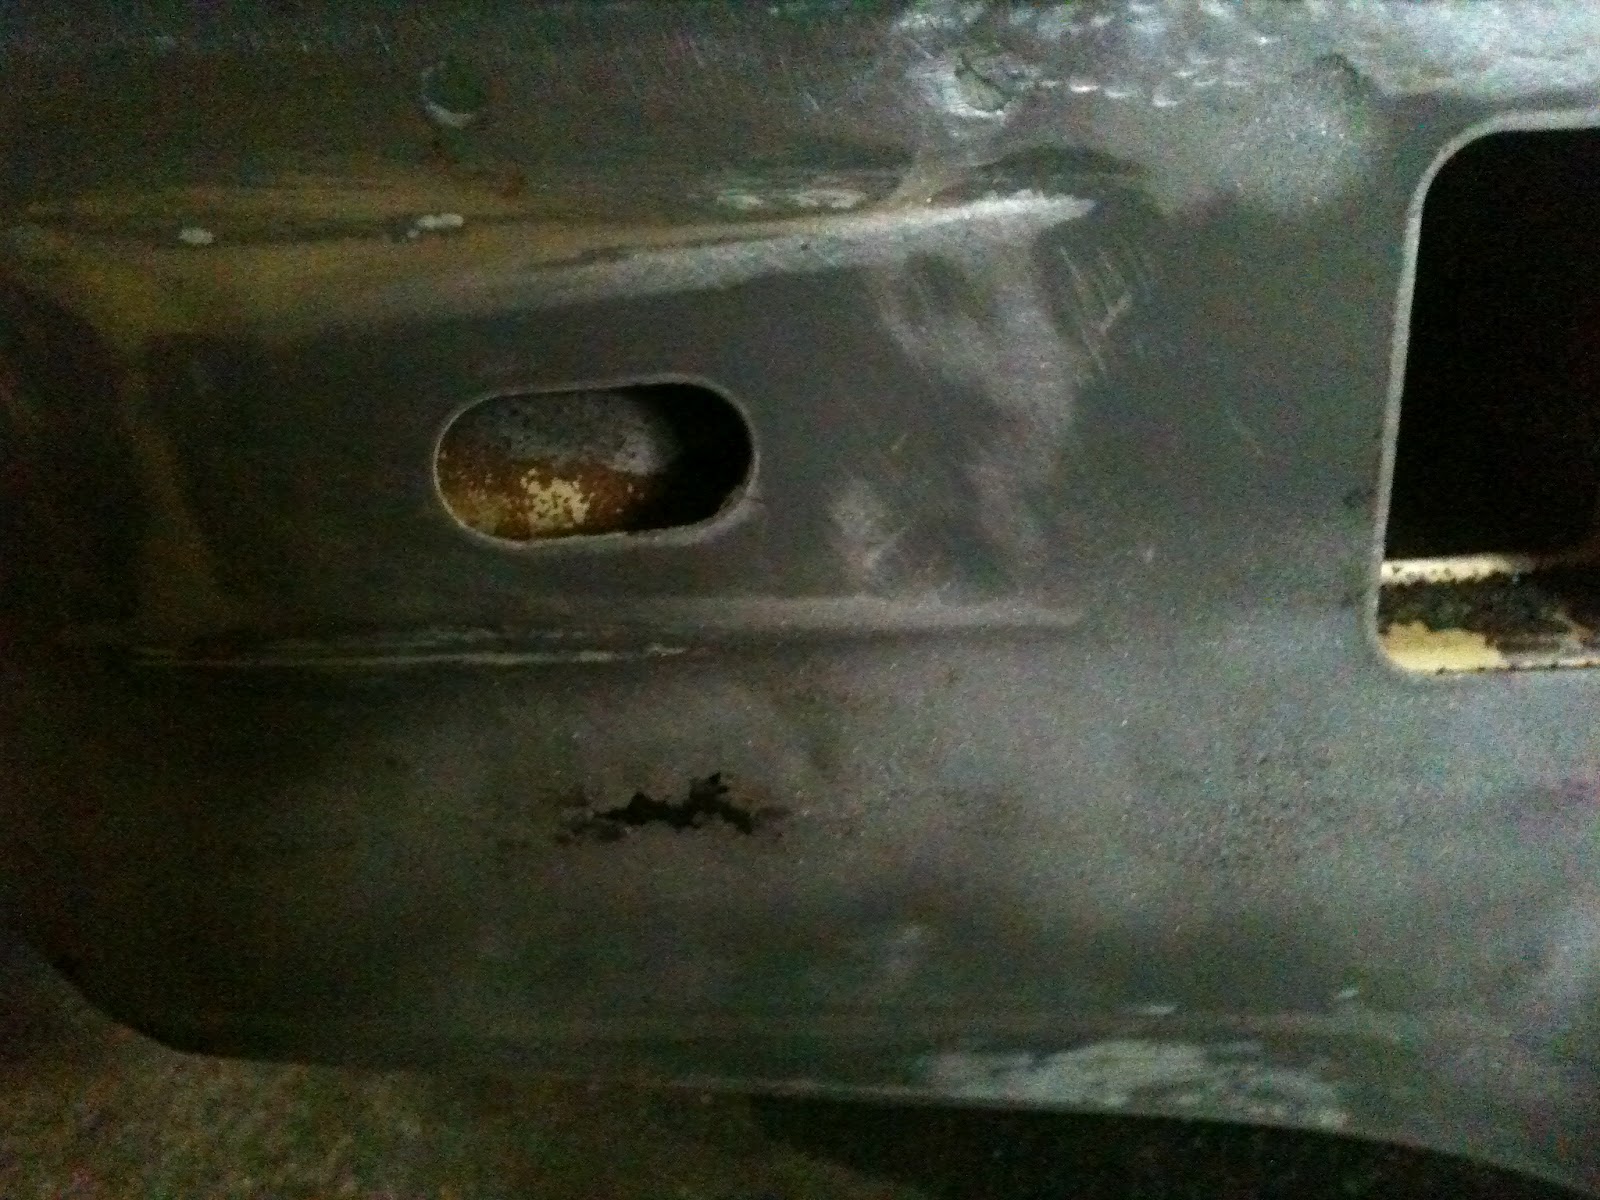
The concern I have with the passenger rear wheel arch and upper panel was that a previous small dent was repaired properly, for 1985.  That means the dent was pulled out using a dent puller that screws into the metal.  Thus there are holes through the panel and they are starting to rust.

So now I have a panel, with holes and its pitting, and it will still need body work.  I am deliberating between replacing the metal of that spot, and replacing the whole panel.  With all this work I am doing on the entire van it would be prudent to replace the panel, at $75 plus shipping it is not the cost but that it will require me to pull most of the interior.

Decisions, decisions, decisions.

Oh to add to the quandary, Bus Depot has sent a message that my passenger wheel arch has shipped.  Received the drivers lower panel last week.  So now I have a wheel arch for a side I may need a whole quarter panel.

Swell.

Oh, to add insult to injury.  My compressor was smoking trying to keep up with the sandblaster.  I think it is on its way out.  Tax season and upcoming birthday bringing me a new 60 gal upright compressor?  Maybe!

I will need it, the front nose panel needs a complete sandblasting.  I let the nose sit unprimered for two days and all the under base coat spots emerged.  Looks like where road debris chipped the front end, these spots of oxidation got their start and when the nose was repainted they got covered up.  Now I remove the paint and get the glory of all the sandblasting I will need to do to make the front end permanently beautiful.

Tomorrow night I will start the removal of the slim panel behind the front bumper.  Its a tad rusty and perforated. 

Hopefully the compressor will hold up to my air grinder.