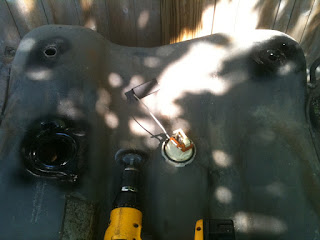
I did prep the tank, and sprayed the underside with a bed liner material that will cut down on road noise if nothing else. I then flipped the tank for access to the holes for the kit installation. I started by wire brushing all the holes outer surfaces. They were all in great shape, just dirty. I used a spray bomb paint to reseal up the bare metal and allowed to cure. I did pull out the sender which worked fine to install a new o-ring. Had the process to remove the tank been difficult, I might have replaced the sender out of a precautionary effort, but since the tank comes out quite quickly I decided to reuse the sender.
As I had stated, the tank was in great shape. The only tell tale leak spots I found were around the grommet holes.
So with Oeticker pincers in hand, I started the reinstall. First was the sending unit, which received a dab of dielectric lube on the seat. Mostly as a protectant for the o-ring, but for ease of assembly as well. I also used it in the grommet holes, and the grommets themselves when inserting the crossover tube.
The kit does not come with directions, but its pretty self explanatory. Two lines come from each of the vapor tanks in the front wheel wells, and there are two lines on each side that need to be attached up. One large grommet for the fuel fill tube, and three smaller ones for the crossover tube (2) and the fill neck vent tube (1). Simple stuff really.
The only advice I have is to use the existing rubber hoses to fashion your replacements with the pre-existing hard plastic pieces, assemble them without clamping yet to ensure you have the length required and then clamp them working your way up from the tank but leaving the last one untouched.
When you lift the tank into place, put the forward lip into place allowing for access to reattach the sender wires and feed the rubber tubes through the space above the frame rails. Then lift up the rear of the tank but have a screwdriver handy to wedge in through the cross member hole as to hold up the tank while you get the tank straps and bolts.
 |
| Picture taken of filler neck hole before replacement of grommet |
Insert the tank straps and finger tighten the bolts so you have no concerns about the security of your tank. Then you can go to each wheel well and attach the final Oeticker clamps to the vapor canisters. While you are on the passenger side, insert the filler neck using a bit of the lube and then the vent tube into the final open grommet on top of the tank. Screw in the three screws that hold up the filler neck to the other plastic filler panel and screw in your cap.
Now go back under, tighten up the tank bolts before you forget and then attach up some new fuel line and clamps to the fuel filter / pump on the passenger side and the return line on the drivers side. Add some fuel and fire it up.
As you can see from the following pictures, it was not the large filler neck grommet, nor the o-ring at the sending unit, but the three smaller grommets that failed.
As you can see from the following pictures, it was not the large filler neck grommet, nor the o-ring at the sending unit, but the three smaller grommets that failed.


No comments:
Post a Comment