Given the length of time I had to wait on the transaxle, I was able to assemble the bits to do a proper install:
Powerflex bushing from T3 Technique, Swepco 201 lube, new clutch kit, shift linkage rebuild kit from Van Cafe, couple shift rod bushing boots / new shift rod bushing, and a new clutch slave cylinder.
With all the bits in hand, I propped up the van.
Inspecting underneath and I get to thinking (Warning - I suffer from a serious case of "while I am under there syndrome") I think that I should also exchange out my coolant pipes and since it's easier to do it with fuel tank partially dropped, and since I am going to do that I am going to adjust the fuel sender so it reads correctly.
So,with the Thingamajigger propped up at door to garage ( garage is too short to fit van in and jack it up the height I need), I started draining fluids.
Cleaned the floor of any debris that will catch the creeper, and then decided to put a half sheet of plywood there to aid movement.
After fluids were drained (coolant and fuel), I got to disassembling the transaxle from the engine. With the Zetec setup, it is imperative to support the motor. I used a custom cut piece of 5x5 PT that I have used before. Was nice to find it again as usually my kid takes that sort of thing and 'creates' stuff.
Removed the shift shaft and mechanism (marking the placement of the shaft versus the clamp), removed the starter, removed the bolts for the CV joints, disconnected the clutch slave cylinder and then supported the tranny while I removed the three remaining nuts that hold the transaxle to the motor. Then (with tranny supported) I removed the front transaxle mount bolts and ground strap from the body.
Carefully lower the transaxle a bit (too much and it binds - or worse, bends the studs the transaxle mounts upon). Now you can start to wrestle the transaxle away from the motor. Pull a bit, lower a bit, pull a bit and lower enough to clear trans mount. Slid right off.
The plywood came in handy to slide the old transaxle out easily.
Now with transaxle out, I slid under and assessed the rest of the plan. I was able to sit up under the transaxle cavity and tear out the ancient matting that was still in a solid form, but the foam part was wet and it had not rained in a couple weeks. Good thing the plastic backing was in tact as the metal behind it would have been rotted to hell if it was not.
With that gone, it brightened up the work area.
Made sense to drop the tank now. Dropped the rearward side enough to spin out the sender and corrected the angle of the float (a best guess).
Then I got to pulling the coolant lines. My coolant lines were really not that bad, as I know they were replaced about 13 or 14 years ago by prior owner Bill. But my precautionary side got the best of me a few months back and I bought the stainless steel coolant pipes on sale from Rocky Mountain Westy.
Having them in the garage, and transmission out, it just made sense. I was not trying to save the pipes for any reason, so I cut them in two pieces each and removed them.
Was a fairly straight forward installation. I made sure to notice the bends in the old one and their position relative to the new ones and marked them with a sharpie.
Within 30 minutes I had the new ones installed. I used some rubber from a coolant hose to surround the SS pipes anywhere they may contact with body metal (abrasion resistance) and since I did not have a rear mount for the pipes, I fashioned one from some SS strapping and a piece of 1/2 inch fuel line slid over. This I bent to appropriate position and used factory mount holes to support the rear portion of the pipes. Also since I had all the coolant out, I also took the opportunity to re route the heater lines and tightened them up to the bottom of the body. Everything is close, tight and beautiful.
I though I took a picture, but I will have to get back under and take another.
Next was to prep the transmission for installation. The older mounts had to be removed off the old transaxle and all the periphery stuff as well. The front mount needed to be further broken down to remove the metal sleeved rubber mount. No matter what configuration I tried, I could not get it to work in the press.
Went old school - hammer, chisel and a vice. Drilled through the rubber in order to provide clearance to thread a hack saw blade through. I cut through the outer metal sleeve in two places to relieve the outward pressure and hammered the bushing right out with chisel.
I pulled it all, cleaned up with degreaser and did them up in the sandblaster.
In the picture you will see the clutch slave cylinder mount, the clutch actuator arm, the front transaxle mount (two pieces).
While those dried, I started disassembling the shifter linkage arm. Removed the pin that hold the lever arm on the shaft and then removed the lever itself. This needs to come off in order to replace the bushing.
Here you can see the condition of the bushing and the housing.

These pieces got degreased and then popped into the sandblaster. Painted and set to dry, my transmission mounts were dry to touch. I built the transmission mount with the new Powerflex bushing and attached it to transaxle. Slid the clutch slave cylinder brackets on the transaxle and then the actuator lever with its circlip.
I found the rearward slave cylinder support bracket on ground so I needed to repaint it, so it's not in this picture. But you can also see the rebuilt shifter arm in the foreground.
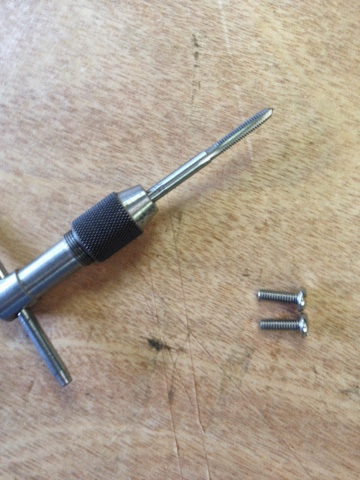
Here it is again with some chrome button head bolts as I could not find the stainless ones I bought and I do not consider it an issue here. Painted that as well, although in New England this sort of thing does not last long. Even powder coating does not last long - one chip and the water gets in and it rusts underneath. C'est la vie.
So now that I had the new clutch installed and new support bearing, it was time to install the transaxle. Remember to fill your transaxle prior to installation, it's just easier. Current VW board suggestions are to use the Swepco 201 for applications under 150hp, and Swepco 210 for over 150 hp. There are huge debates over this no matter what vehicle forum you peruse, I went with what Rancho suggested.
Slid it under on my creeper and rolled it off. Got it lifted into place with assistance of a floor jack and got it up there with some more wrestling around.
Installed transaxle, time to reinstall the starter, shift linkage, new slave cylinder, all the mounts, CV joints, Zetec specific speed sensor, ground strap, etc.
In this photo you can see the next project - resealing the HC oil pan. Will do when I perform next oil change. I was also grabbing tools to connect the CV joints here, and grease to repack the joint.
Transaxle installed, connectors all checked for proper torque, I went to cooling system and checked all those connectors and clamps, then reinstalled my fuel tank. Time to check for leaks.
Filled with coolant and refilled my fuel. Fired right up and shifter worked, but was finicky. Assumed that due to my 'new' parts, I would need to play around with adjustment. Took me a half dozen tries to get it where I was somewhat pleased. Still think it needs additional adjustment. Will use a bit and correct after break in period.


