25 January 2012

Primer

Dont have any pictures yet, but I do have the name of the first primer coat.  Its a Dupont product called Metalok.  Its a 2 part epoxy primer that will bond itself nicely to the baremetal and VW basecoat that remains.  From the Dupont site:  "DuPont™ Metalok® 250S™ is a non-sanding, chrome containing pretreatment formulated to provide maximum adhesion and corrosion resistance."

Edit:  this is the stuff.


I bought a gallon of the stuff, with the activator that set me back $300.  Then there will be the high build primer, which is a DuPont Nason 2K urethane primer 421-19 Selectprime. 

EDIT: This is it


And finally the paint system I am choosing to use is an Imron paint.  Its a regrettably unrepairable paint, rather you must panel paint instead of blending and hiding any repairs, but it is a small price to pay.  It NEEDS to be painted in a spray booth, to bake it on or else I will have to look at a poor finish for all its remaining years.

All of these products are intended for fleet service, and will provide YEARS of additional durability to the Thingamajigger's aesthetics.

It is not low VOC, probably not available in California, but there is a low VOC version that is water borne.  I am going with the stuff that will make me giddy for a day or two from fumes.

22 January 2012

Stripping rear panel

OK, this panel was the one I feared the most.

Not because it is low to ground, or because it has more visible rust than any other panel but because of the multitude of bends, crevices and oddly shaped curves.

Tore down the lights, license plate bracket and bumper.  Slathered on some chemical stripper and fired up a La Gloria (not Cubana) cigar.


I picked up a box of these in Tampa my last way through on a suggestion from shop owner.  Medium bodied, decent flavor.  I would give it a 6.75 on a 10 point scale. 

I actually did not think I would be working in garage at all today.  Its Korean New Year, and I got all my requirements done early so I could have a few hours in garage to play.

While rear panel was stewing in the chemicals, I finished up the rear quarter panel.  It needed to have the remainder of the gray primer sanded off.  And I needed to finish around the perimeter of the rearmost glass.


Et Voila!


So a final slathering after I removed the remainder of the bracketry for the awning.  Allowed to sit and scraped off the slime.

It came out sweet, although I want to sandblast the face and underside of the rain channel.  You can see a spot of rust where the awning was mounted in the above picture.

Clean and beautiful.  Good lines that will provide good definition to paint when applied.


21 January 2012

Ran out of chemicals

First gallon of stripper down. Mid way through an anticipated 10 inches of snow today

Got the right rear quarter panel, and the corner panel done today.

Before work picture on left.

Got the Slider door mechanism cover off, with the nifty gasket that is missing on so many vans.  Also removed the grille covering the intake on the upper rear corner off. 

Do not really care about the gasket on this window, I have a replacement.  One that does not require the insert that looks so bad after a very short time, from a later model van.


The panels themselves are in great condition.  The darker color is the VW applied base coat.  The gray color is the primer residual that is left after the chemical stripper has done its thing.

I am no auto body professional, but I will venture to guess that the gray primer is not being completely removed due to it being a water borne product.

For me to get completely down to the factory basecoat, I am sanding by hand with a scuff pad.

Aside from the rol loc disk being used in front directional space, no mechanical sanding as of yet.
Why you may ask?  Well, I am trying to keep the dust down right now.  I can remove the paint with chemical, it falls onto a drop cloth and after a couple days it is hard enough to scoop up and place into an old gallon paint can.  I will hold onto that until the city's hazardous waste day.

Dust, would get into everything, all my tools, my Harley's (even though they are covered) and find their way into the van, into my house, into the other cars . . . 

There will be plenty generated before the paint is applied.  No need to rush.

You can see the hatch in the last shot.  It has the typical window rust spot.  I will not be doing anything to this particular hatch.  Its junk, with multiple holes on the bottom, so just not worth anything.  I will save the glass as a backup.  Might be great to slide down a snowy hill?

The flag in the window is a Korean flag.  We fly the American, Acadian and Korean flags in reference to my wife's Korean ancestry, my Acadian ancestry and our beloved United States of America.

As for the van - I will need to get some more stripper, hit the slider rail area well, and finish up the very bottom of the panel aside the slider and we will be close to done on this side.

Strip baby strip

Lucy Liu never looked so good.  Well maybe in that Black leather number from same movie  . . .

15 January 2012

More bodywork

Have some final touch up work to do, but essentially the nose is done.  Today was especially trying.  It was 9 degrees outside when I went to garage to work.  After an hour, the propane burner had gotten the temperature up to a balmy 45, but I was having issues with the propane tank valve freezing up so every few minutes I would need to shake the tank to get some more heat.  Did not assist the chemical stripper process at all.

The picture of the front end shows the bottom piece that meets up with the bumper support that is going to be replaced.  I have the panel already, and you can see from the picture is has rust spots and is still painted (somewhat). 
  

While we are waiting on one panel's chemicals to work, I finish up the nitty gritty of another panel.  The top of the B pillar received some attention today.  I took out the spot blaster only to realize that the space is too small for that particular tool and I will have to wait until I get a pot type blaster to do that crevice.  Otherwise. the panel is done and beautiful. There is some small points of body work that need to be attended to, but rather than going the route of the new age body man and use copious amounts of body filler we will try the old fashioned heat and hammering to get the panels where they should be and minimize the plastic filler.
Finding more oxidation spots under the paint that needs to be spot blasted. 

Today's flavor was a Don Raphael, made by Victor Sinclair.  A medium bodied smoke with less flavor than yesterday's La Gloria Cubana and primary music choice was the Dropkick Murphy's.

I did start on the slider door as well today.  It is a replacement from a prior owner and I found Orly blue paint.  It also had a strange series of holes down the middle of the panel, not for the later model cladding, for something else and I am further confused.

This blue paint was being stubborn in the cold, so I broke out an electric radiant heater to warm the panel up from the sub 50 degree ambient temperature.

Still have 3/4 of the panel to do including the interior of the panel, so I will take it off soon to do that in a horizontal position and probably at my friends body shop where it is warmer.

While I was waiting on multiple coats upon the slider, I took it upon myself to start the passenger rear corner.  First order of business was to remove the bodywork I knew was upon the rear arch to find this (picture on right).  Since I was aware of this panel being worked on, I ordered it from Bus Depot (and the same panel for the other side).  Unfortunately the passenger side has been on back order since November.  May have to source it out elsewhere.  I will need it soon.

Started removal with a hammer and sharp chisel.  My compressor is dying and I will probably have to replace it soon.  It just cannot keep up with an air tool like the cutoff wheel or angle grinder.

To explain the rear corner panel's removal may be a bit confusing, but the rear seam of the panel is attached as the inner most panel and can easily be separated.  The front of the panel is the same way.  The top of the panel is another story.  It is tucked between the floor piece and the tab of the upper panel.  Sort of the middle of a sheet metal sandwich.  Understand?  This is important to know as just tearing out the panel is not so simple.  It is possible to tear up the floor and make alot more work for yourself.

The rear corner panel can easily be removed, which I did.  And have these panels for both sides waiting to be reinstalled.

I am lucky on this side.  The other panels at these joining areas are in great condition.  Cleaning up the areas with grinder and sandblaster for welding / sealing will be much simpler and a better finished end product.  I am pleased with today's efforts.


With cigar smoked, feet cold as hell and my few hour allotment filled productively, its time to go play with my son and thaw out.  Indoors!

14 January 2012

Stripping, part deux

I am almost inclined to put up a picture of some temptress on brass pole for one of these posts on stripping.

Day two - and I will state now that I will only do a few hours a day of this.  My son deserves my time, and I try to give it freely.  This morning I met with my friend the MB mechanic to do some maintenance on the S420.  Transmission flush, filter and gasket, a couple transmission shift linkage bushings, new belt, and figured out that my vibration at speeds above 70 are due to flat (dead) motor mounts.  They are hydraulic and no longer performing as needed.

So there went a couple hours.  Couple hours to play with the boy and I was given the ok to tinker in the garage.

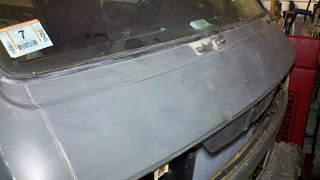
Started working on the van about 2.

Took apart the removable pieces - the grilles, directionals, wipers, headlights, bumper ends, etc.  Did not bother (yet) with the bumper itself as it gave me something to tuck the tarp into and catch the debris from the stripping process.

I stuck bags on the air intakes to keep crap and debris out.

All the parts in one place, labelled and appropriately packaged.  I had a bunch of small (2in x 3in) ziploc bags that were perfect for holding screws.  This will make it easy to go shopping for replacement stainless hardware.

This crate is the takeoffs from the front end.  I have others with parts all over the garage. 

Well labelled parts make for a happy Chef, and an organized and easier re-assembly.  Its a sickness.

Lay the tarp, tape off what I do not want endangered and get going.


First coat of the chemical stripper was applied.  Looks as if the front end was stripped before.  From what I removed, I could only see one coat of primer and paint, not two like on the rest of the van.  Got my curiosity going.

With two coats of stripper, the picture on the right shows what I am left with.  Its completely by chemicals, no mechanical apparatus as of yet.

I am doing sections so as to not overwhelm the garage with fumes, especially since I also have a propane burner providing heat.  I could work in the colder air, but the chemical stripper needs warmth to work.

You can see the VW applied base coat, and where the base coat was removed during the prior work.  From what I am seeing doing the right front, I was guessing that the front was chipped from normal road activities.  They simply sanded it down to make it smooth for the new paint coat.  Makes sense.

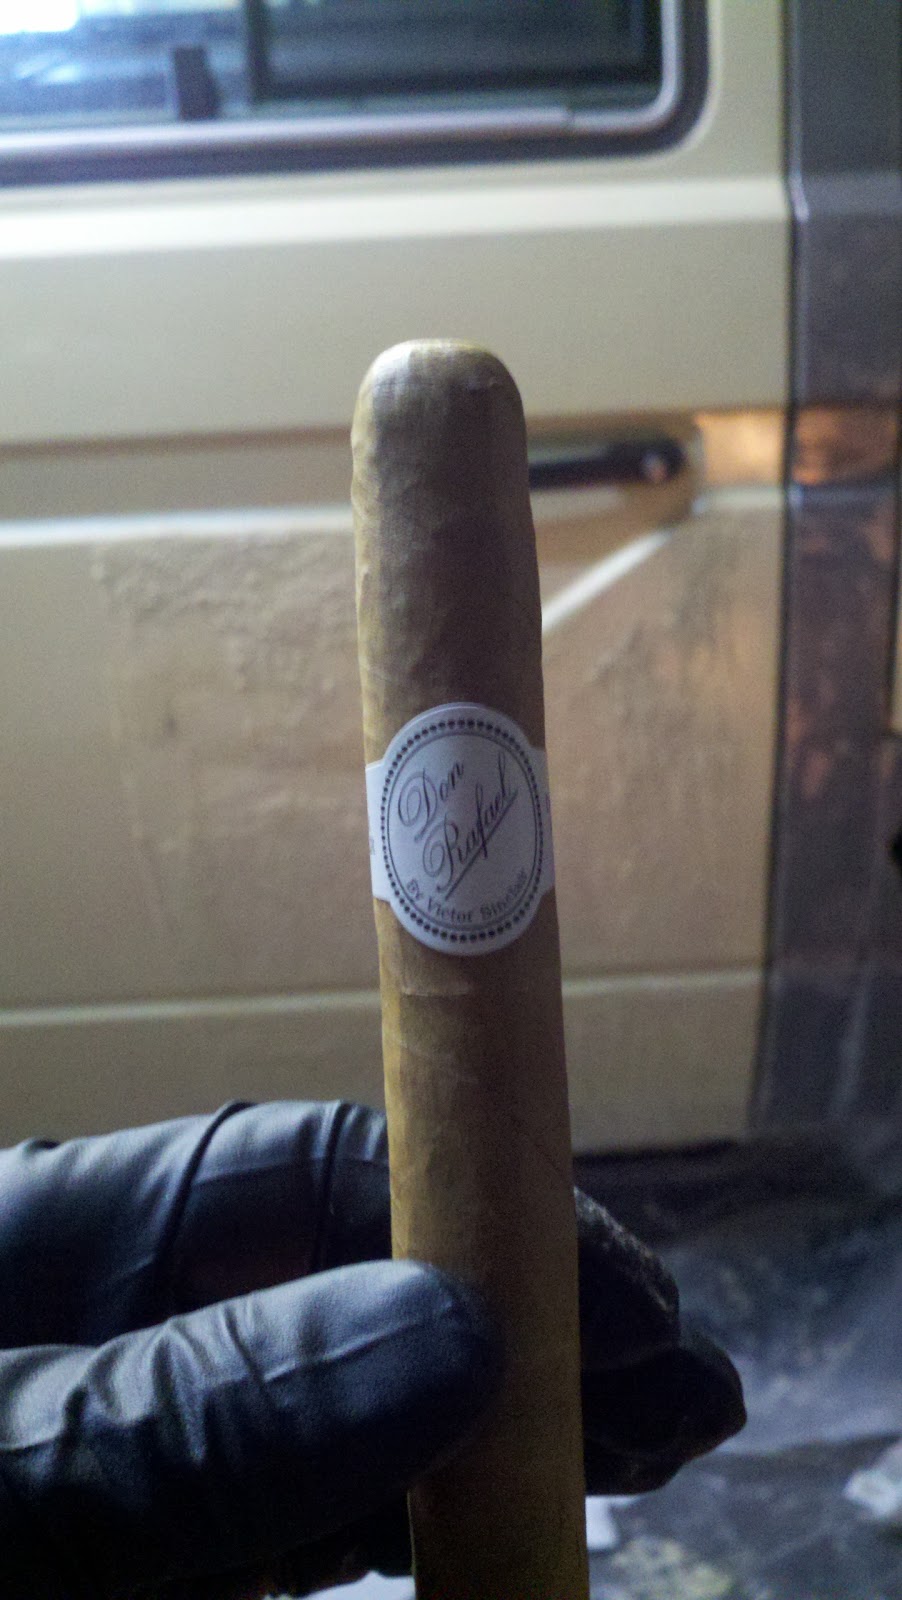
So while the chemical was doing its thing, and I am standing there looking at it, I don't know why I would not add to the fumes and light up a cigar.  Today's flavor was a La Gloria Cubana Serie R.  Good smoke, full flavor and one of my go to smokes in the humidor.

OK, now the cigar plug is over, back to work.

After the second application of stripper, I allow to dry.  Wipe down with paper towels and a generic version of prep sol.

Once clean and dried, I took a scuff pad to clean anything else up on the surfaces. I did need to take my cordless drill and a rol loc disk to clean out the crevices near the directional mounting space.

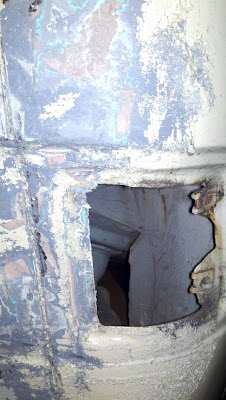
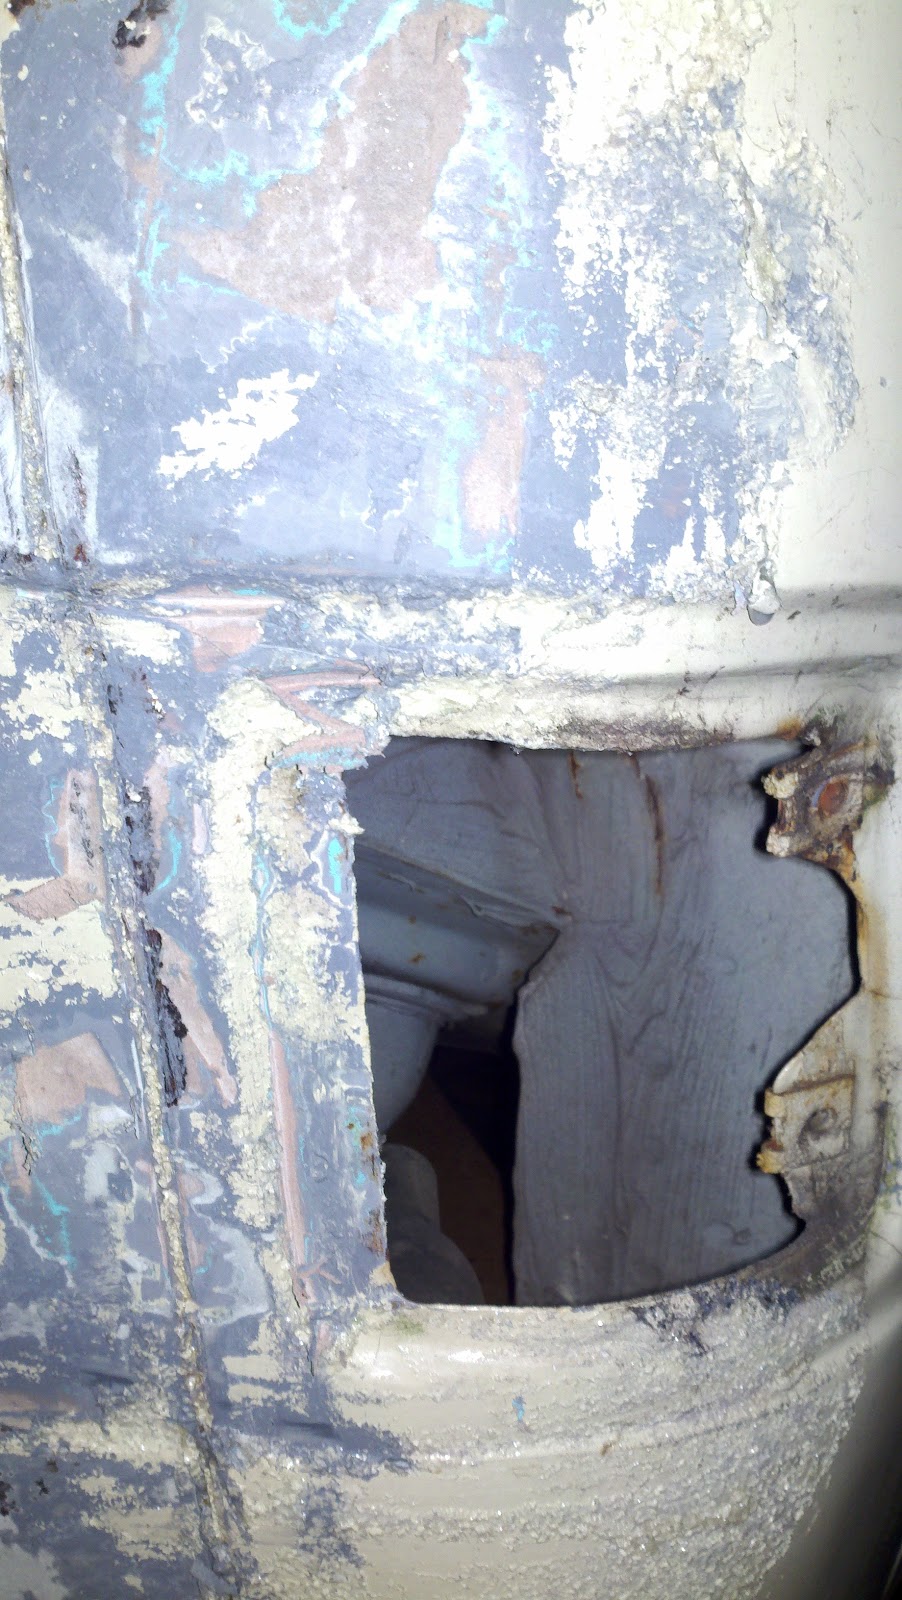
Now that I have the passenger side done, I moved to the drivers side.  After two coats, I find out the true reason the front end was stripped in prior paint job.


Yep, there is putty under that primer.  Not much, but it will have to be removed and redone.  Not that the job was not done correctly before, but now that I have had chemical stripper near the putty, it will all have to come out.

Good thing is that form looking at that corner from inside the grille opening, it does not appear to have been a major accident.  More like a deer strike, or branch impact.

There is also a couple odd dings equally spaced, and centered on the upper part of the front end.  Maybe from a bike rack, or something strapped to the front.  Minor stuff.

Overall - nothing that I did not expect, and actually less than expected thus far.

I finished the smoke and went to play with my son in the snow.

Will have some sand blasting to do, spot blasting and attending to hidden areas with rust.


Still need to touch up around wiper shafts, and as soon as I can figure out how to remove the windshield washer
fluid squirters without breaking them.
 Have always thought the vanagon should have an automatic antenna.  May have to figure this one out.

13 January 2012

Strippers, stripping and voyeurs

Much more dramatic title than the content.

Started the long awaited process of stripping the paint off the Thingamajigger today.  First, I dropped off the front doors and the rear hatch for some stripping love.

Then I got to work on the rest of the van.

I started in the front passenger corner because (currently) that is the most accessible.  Once the 2 door refrigeration unit is gone, then I can have better access.
After removing the gas surround (three screws and a counterclockwise rotation) and the aluminum support bracket for the Trans Awn 2000, I was ready to prep the work area.

I use cheap plastic tarps that I cut up to cover the wheel and the wheel house.  I also covered the gas cap in case goo got between the open hole.

I am using a high strength gel stripper agent.  Applying with cheap 2 inch brushes from Lowes.  I also am using duct tape and roll paper to keep any drippings away from areas I do not want goop upon.  Inexpensive plastic putty knives assist in 'scraping' although there is not much left after the stripper does its thing.

One note:  the VW factory put a base coat of something (probably epoxy like) as a protective layer under the paint.  It is important, if we are going this far, to remove that layer as well.  This proves to be the hardest thing to remove.  From the picture below, we can see why removal of this is important.


This little oxidation was found under the factory basecoat, and its not the only one.  Stripping to metal will ensure my paint
job will last another 15 plus years.
 After stripping the various layers off, I will media blast the oxidation spots, repair any dents and then immediately spray on an industrial epoxy primer that is high build in nature.  I wish I could tell you the name right now, but I was given a quart of the stuff for this weekends work from the auto body without a name attached.

More stripping tomorrow, then I can get into the panel replacements and alot more sandblasting.

The primer will sit until the remainder of the van has been done, then the finish work

11 January 2012

Now that the panels are gutted, I got them into the van ready to go to bodyshop.  I simply do not have the room to do the stripping at my house and still be able to work on the van simultaneously.

They also have a better sandblaster than I do.  I want the bottoms of the doors to be blasted, helps to ensure that there is no rust lurking under paint just waiting to emerge after I have it repainted.

Its all about the preparation.


To illustrate what I am working with.

I have enough room on one side of the van at a time.  Basically 3 or 4 feet on one side and front now.

As soon as a certain commercial refrigeration unit is sold, I will add another 2.5 feet in back.

So I can work on one side, or end at a time.  Then the Thingamajigger will need to be turned around.

Sleet and snow expected tomorrow.  We have been lucky this year; we had a surprise just prior to Halloween and barely nothing since.  Has allowed for some garage renovations and organization to get the Thingamajigger in there.  Feeling better about the winter project prognosis.

Picking up some more lighting this afternoon.  Contractor neighbor is tearing out some 2x4 t8 parabolic flourescents that will light up my life a bit better from a Chinese restaurant renovation.  I can have 8, so I am thinking 4 per bay and with a tripod mounted work light I should be in good shape, too bad Vitamin D cant be made from flourescents.

02 January 2012

Guy in a F250

Brand new fire engine red, diesel exhaust as loud as he could get it, stopped by today.  Saw me welding up my driveway gate and stated he has been looking at my Vanagon.  Great I am thinking.  Better get the plate in case the Thingamajigger disappears?

Wanna sell it he asks?  No deal, not looking to sell I tell him.  Enjoying it too much.

Says he is a Jetta builder looking to get a van. I pointed him towards The Samba and wish him luck.  If he has questions, I am happy to answer if I can, that ability and willingness increases with beer.

Back to welding my gate.