31 December 2011

Front doors - addendum

Having the door open, gutted and available makes for EASY soundproofing. 

I laid it across the entire door, clean and complete.

Will be better than I previously did on the Thingamajigger's existing doors due to having full access to the entire panel. 

Now I can start blasting and stripping to get it ready for paint.

Gutting front doors for paint

As I had stated before, I had procured a couple of doors from a 90 Multivan to prep and rebuild for the Thingamajigger so that I could get them done without exposing the van to the elements.  I have a new hatch that I will do the same thing, but this post is about gutting the doors.

There are as many ways to gut the doors as there are in cooking a cat; here is how I did it.

First, find a secure place to support the door in order for you to work on it.  A folding table would have worked well, but I put mine on a large Rubbermaid trash can as my table is being used for stripping some bathroom mouldings.
With the first door supported, I carefully took off the inner plastic that acts as a draft eliminator.  I then carefully worked my way around the door separating the door seal from the door shell.  There are 4 small push clips in the seal that need to be taken out very carefully.  There are four of them in total.  Three of them exist at the front of the door.

One more exists at the rear of the door.

I then unscrewed the inner door handle.  Removing it allows for the subsequent removal of the door latch assembly.  When disassembling things like this, its nice to find all the screws come apart easily.  Signs that it was well cared for during its time with a PO.

The door latch is next.  The smaller screw shown on the right is for the outer door handle.  Be sure to support it as it will fall out and ding up the powder coat if you do not.

Remove the other two screws and you will be able to slide out the latch mechanism.  There is a plastic clip that slides into the mechanism that goes to the lock door pull.  Ensure you are not yanking on that too harshly.  You will need that again.

Remove the mechanism, the door lock pull and the ferrule the door pull slides within.  To get the ferrule, you pinch it from inside and slide up.

Next I removed the window crank assembly.  My doors have mechanical cranks and are not power windows.  I like them that way.  I have seen too many problems with the power windows (much like the rear windows on the S420).  I am happy with human cranked windows.

Have a cup or small vessel to hold your parts as you take them off handy.   I find the magnetic bowls you can get at tool vendors are great for this sort of work. 

First I removed the two 10mm screws at the bottom of the window itself.  Depending on where your window is positioned, you may require both a 10mm wrench and/or 10mm socket.

Once those are removed your window will move with a little assistance.  Pull it up all the way.

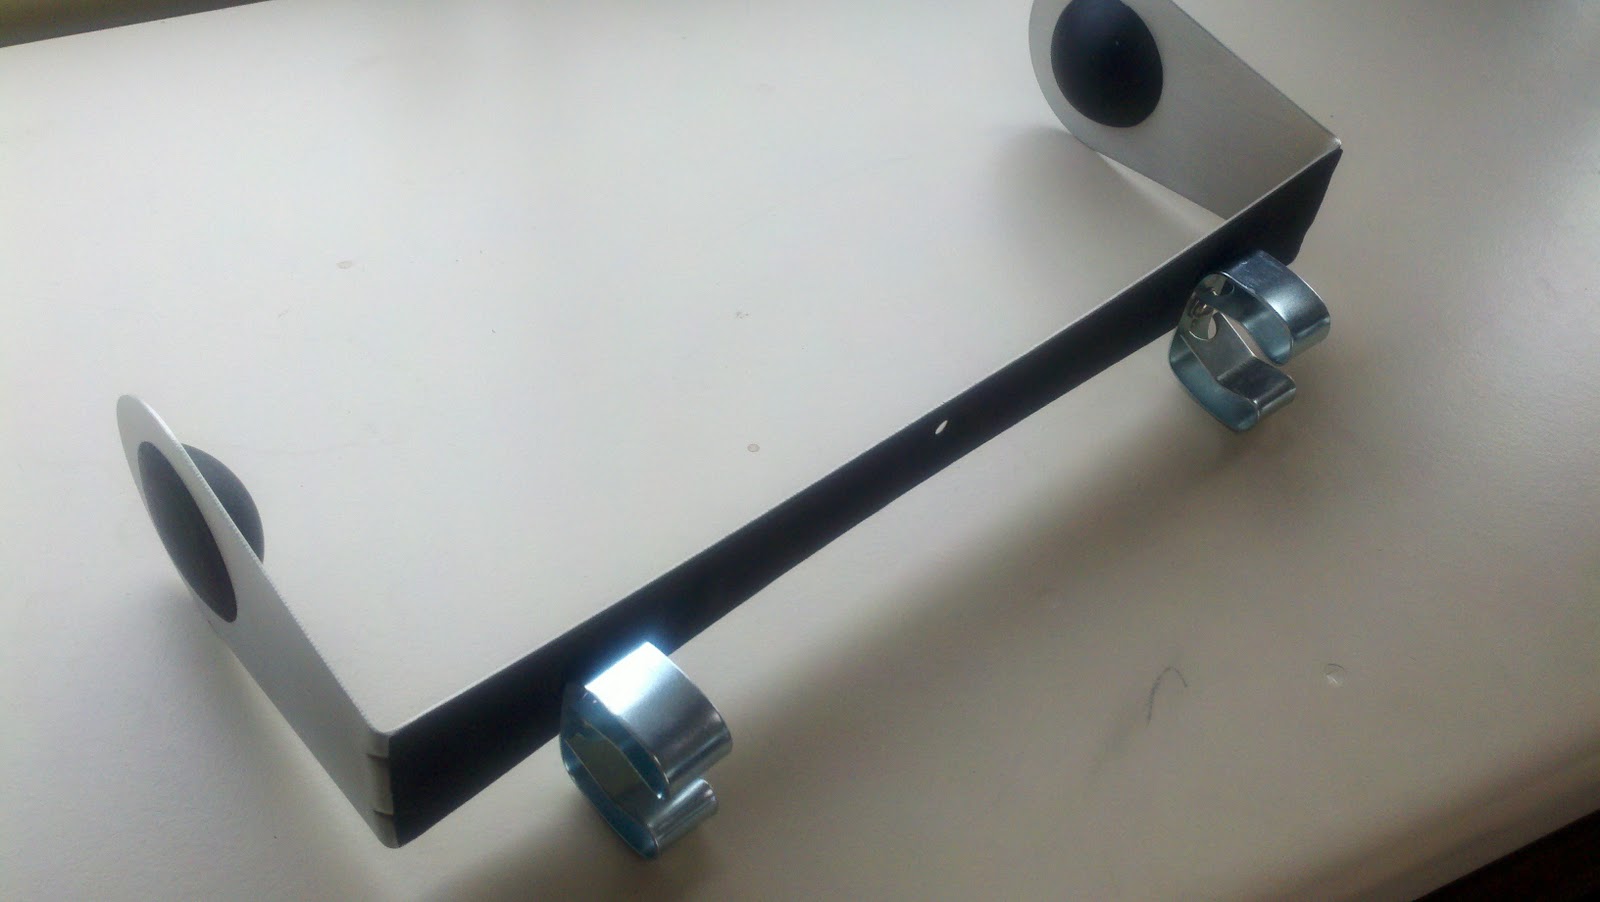
The next task was to remove the two 10 mm screws that hold the crank assembly on the door shell.  The crank assy will fall into the door shell once both of these bolts are removed.

Finally, you remove the bolt at the bottom of the door.  Its a 10 mm and it holds the bottom of the door guide in the door.  Once this final bolt is removed, you should be able to maneuver the crank/guide assembly out the largest access hole in the door shell.  It may require some gentle twisting and do not forget to unclip the protective sleeve that is affixed to the speaker hole in the door shell.

My next task was to lower the glass into the door shell and start removing the seals that surround the window opening.  The first is the one at the top of the door.  Be careful with this, the inner part of the seal is made from aluminum and will bend into crazy shapes.  Additionally, the end of seals where they mate with other seals around the window are glued together at the factory.  My seals on the Thingamajigger have lost this 'glue', but the new doors still had a good seal from the glue.  It can be worked apart, but be gentle.

You can see the overlap of seals on the left.


The lower seals on the door are two pieces.  They clip into the door and can be gently pulled out starting at the open end from the seal you just removed and working your way forward to the vent window.


From this picture, you can see the overlap of the lower two piece seals and window 'scrapers' to the vent window seal.


Next part for me to remove was the 18 inch rubber seal in the track next to the vent window.  The upper portion is easy, but you will need to tug on the seal a bit to get it out between the track and the glass itself.


With the seals removed, the glass will come out.  A bit of twisting is necessary, but it slides out fairly easily.


Final task was to remove the vent window.  This 10mm bolt and a philips head screw at the top of the door is all that holds it in.

I also used a bit of spray silicone on the rubber seals to make movement easier.

A side note on the use of silicone - BODY SHOPS HATE SILICONE!  Make sure any spray silicone residue is removed with some good cleaner before bringing to a shop.  They have no idea what is on the door and may not clean it before sanding the panel and forcing the silicone deeper.

They do clean prior to paint, but what if it all does not get off?  The paint 'fisheyes' and looks like crap.  Do yourself a favor and clean it up immediately after use.


So to get the vent window assy out, you will need to slide it out a bit and begin twisting the assy as the bottom of the guide has a bracket on it that will not come pulling straight out.


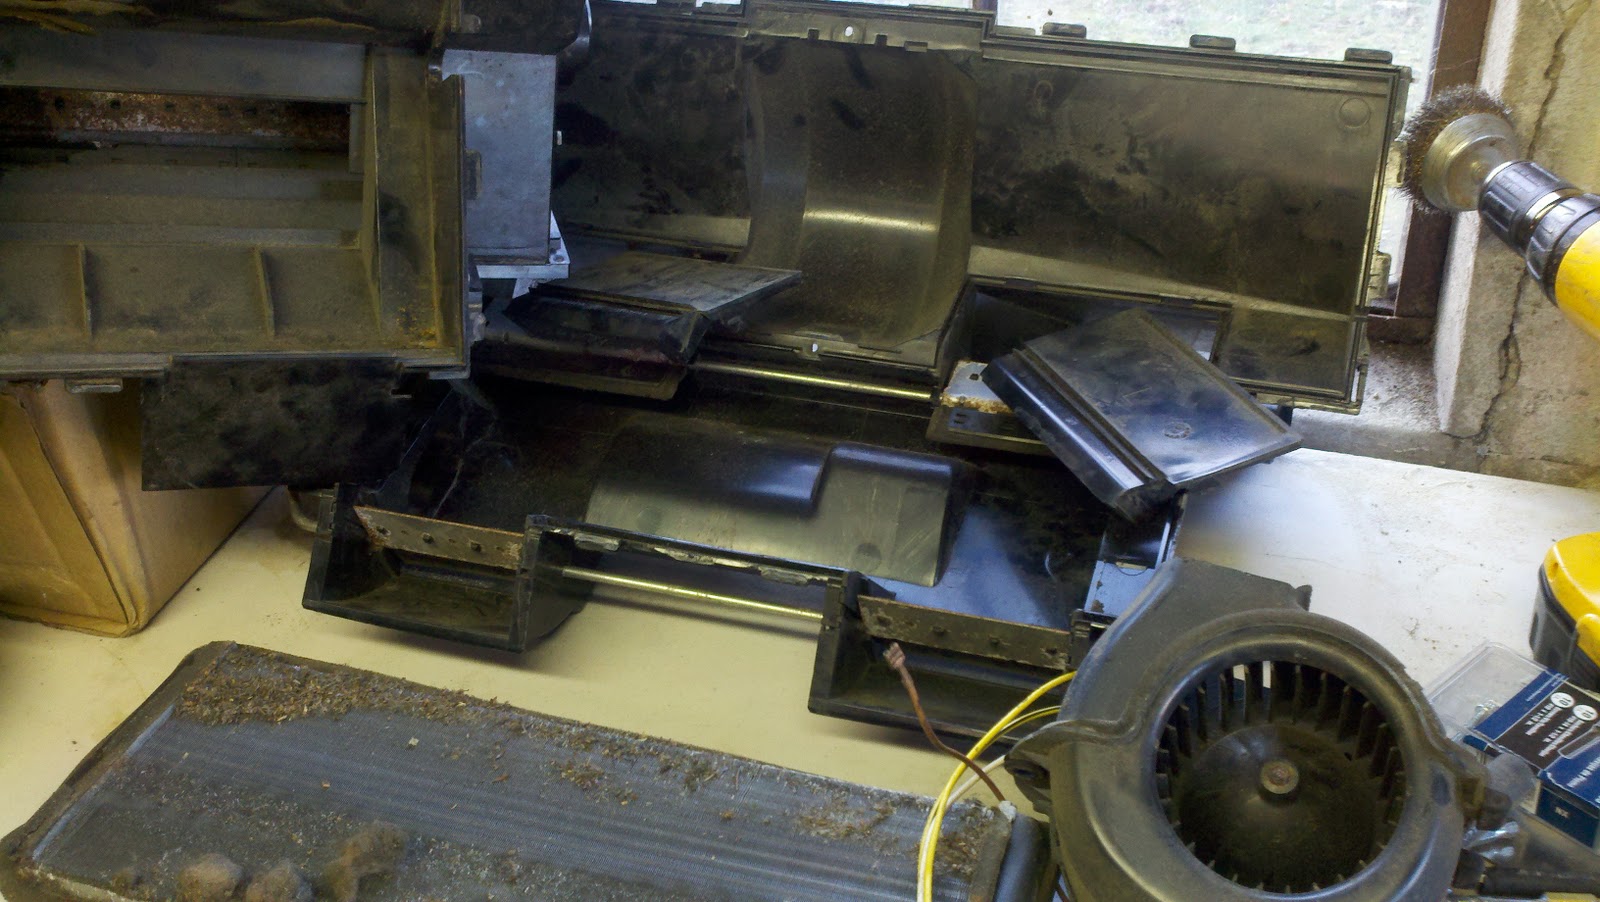
Now you have a gutted door ready to be prepared for paint.


My doors will require a bit of sandblasting and will be totally stripped to metal.

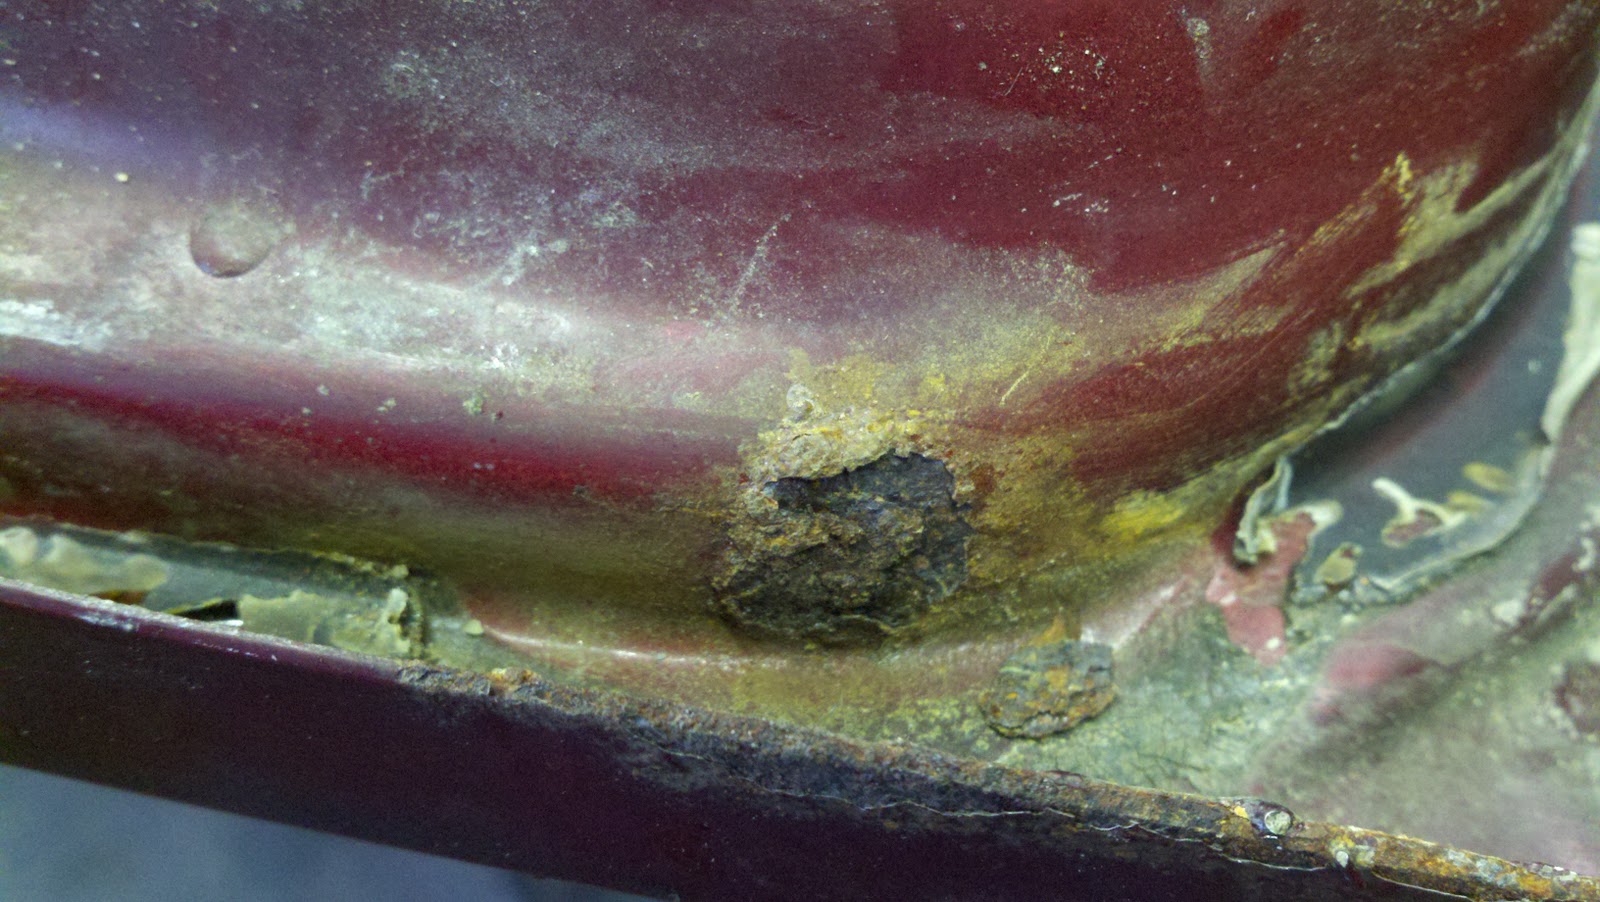
This is the worst of the rust. Only a spot of it, but we will blast
the whole bottom of the doors for giggles.
Final note:  I am a big fan of inserting the bolts back into their respective places on the removed pieces.  It saves the aggravation of figuring out where they go from a cup of bolts when the reassembly may not be for a couple months.

EDIT - It is now a month plus later and the doors are now blasted and ready for primer.


The exterior was stripped with a chemical stripper.  The inside - a bit more difficult with all the crevices and funny shapes required a blasting with a light grit media.  These doors have not looked this good since they were stamped in the factory.


I am excited - these doors really looked great.

30 December 2011

Heater Core - Partie Deux

So I put the box together.

The blower motor arrived from Van Cafe.  Its a Febi unit, and regardless of where it is made I trust this brand a hell of alot more than anything with the Meyle name on it.  Just have not had any luck with anything Meyle, but I digress.

I used a single sided sticky foam insulation of about 1/4 inch thickness on the blower motor seal.  It fit like a glove with the rubber feet of the blower.  The wiring was in decent shape, but I built a new harness with some good quality 12 ga wire and appropriate connectors.  A few choice pieces of shrink tubing cleaned up the wiring and gave it an extra layer of protection.

I used some clips I had procured from other heater boxes, and a half dozen or so self drilling screws in key locations to seal up the heater box.

It is now ready for installation!

Hopefully one or two of the external foam seals is able to be reused.  I have not found a source to buy these, and I am sure I could make them but no need if the ones in the van are good.

29 December 2011

Starting teardown

This week I started diasassembly on the new rear hatch. 

It needs to be gutted, cleaned out and readied for paint stripping.  All of the clasps, window/seal, handles etc need to be removed.

I have the two front doors to do as well.  They will be more cumbersome, more small pieces to remove without damage.  Tricky.

Then a bunch of paint stripper and a whole lotta mess.

Have to borrow a slider door, to keep the van sealed up while I strip that panel.

Will get some photos of the process for anyone brave enough to try.  I have a couple more replacement panels coming, currently on back order through Bus Depot.

While we are on the topic of Bus Depot, I have a rant I would like to share - With all the technology available and obviously used at BD, why cant they list a part online as unavailable?  Why do I have to wait two or three days after placing the order, after receiving emails that the order was received, that the order shipped, and I then get a message stating I have a backorder?  Really folks.  The other Vanagon supply houses have this ability, and it seems like common courtesy for those selling online?  I am at a loss, and temporarily suspending my purchasing from Bus Depot until I feel that I can deal with the BD BS.

Christmas has come and gone.

And with much rejoicing (yea) the stresses of the holidays are over.

Have received some good news and some bad.  First with the bad - I have the beginning drip of coolant from the drivers side head gasket.  And I also blew an exhaust gasket last week going for a ride.

The good news - I got the parts to fix the gasket leak.  I also got the parts to finish the front heater box.  The new wiper motor and some misc. used parts (another table mount for front, A pillar seals that did not come on my year Westy, and a tachometer cluster from a 90).

The tach cluster will require a bit of modification to work, but I remain optimistic on finally getting a tachometer in the Thingamajigger.

As for the motor leak.  I guess this speeds up my need to have a decision on which way to go - stock rebuild or conversion.

I do like the Bostig . . .

20 December 2011

There are some things that need to be done

Organization is at the heart of a Chef.  Mise en place, or 'everything in its place' prior to starting a project is key to a happy outcome.
Alas, this was not making me happy:

This is a clusterf*ck of a homemade shelf I inherited when I bought my house.  I kept it as the other half of the garage is lined with wire racks that have served my organization needs - until now.

I could not get something off the shelf without knocking something else down.  That pisses me off.

There was 4 feet of these half ass shelves full of all sorts of stuff.

And this is in addition to the wire racks on the opposite side.

Time to consider options.


SO when you mention that your organization needs a fix to a friend who is a contractor, you expect a certain amount of professionalism and an idea or two.  What I got was a maniacal laugh, some comments about my anal retentiveness in my work areas (especially my kitchen), and a room full of laughter at my expense (wife included).


The corner to receive the shelves

When the laughs subsided, and we all caught out breath, grabbed another round of beverages and all of a sudden Mick the contractor yells "I GOT IT!" with such vigor I thought he would wake up my sleeping 4 year old.

From the explanation I got, it seems that Mick had signed a new contract that day and the new T Mobile site had some demolition that needed to be done before becoming the latest bastion of cellular technology in this city of 500 phone vendors.

The demo?  Multiple shelf units of a 6 inch depth.  Each one measuring 2 feet wide by 8 feet high.  I scored 4 of them, and some 4ftx8ft retail slat wall panels.

I cleared out the back corner to get ready to install the first of the shelves.  Broke out the ramset, some pressure treated 1x6 and got them shelves up.


This is what three of them look like installed.  Perfect depth for most of my needs.  May need a larger shelf to support the various Harley manuals and other books.  But everything has a spot, I have room to grow (a fourth shelf yet to be installed) and its ORGANIZED.

The added benefit is that the space taken from the wall is minimal, providing more work space in an already cramped garage.

This makes me happy.

Now if I could only sell the 5 foot wide commercial refrigeration unit that is taking up so much space.

18 December 2011

Just thought this was cool

Tim from Maine had this in his Inspector Gadget Vanagon.  I had to duplicate it because of its multiple uses and placements.


Its a simple paper towel holder I had in the basement, with two spring clips usually used in closets to hold brooms on the wall.  Some small screws with loc nuts and you have a papertowel holder that can clip nearly anywhere.

I like to keep mine here

Tail lights


Aside from the high quality bumper, and a rotting hatch that is soon to be replaced, I made some modifications to the taillights utilizing the vacant holes in the US taillights.

The method is quite easy actually.  A donor taillight backing (the part that holds the bulbs, and snaps into the lens) is required for almost all of the parts you will need.  From the donor, you need to peel back the contact strips that bring electricity to each socket on the backing plate.  Located within the socket is an 'L' shaped spring-steel piece that provides the contact and spring resistance to the bulb.  Remove these contacts.

Now that you have seen how easy the piece comes out, now you must insert two of them in the vacant holes in your existing taillights.  I was able to do this most successfully by carefully cutting away one side of plastic melted tabs over the necessary metal lead into the socket so that I could lift the lead slightly and insert the contact.  Then you can replace the lead in the backing plate.

The light is not ready to install yet, as we need to add juice to this lead.  If you look at the backing plate, you will notice the leads coming together at one edge with just enough space on that edge to insert a fine washer between the lead with power and the lead that goes to the socket you just modified.  This will be your easiest power source - keeping it internal to the light.

Replicate on the other side and enjoy the doubling of your rear visibility.

Front heater core - Partie une

OK, as previously noted - my front heater core was clogged.  Now in my mind, if I am going to spend a couple days removing and replacing the dashboard, I will be damned if I am going to install a used part.

So given that the wife's CR-V was hit a couple weeks back and we will need to have it repaired, I cannot immediately tear apart the van as I will need it to get around.  The wife will take the S420 and I will look cool in the Thingamajigger.  The S420 is about 4 feet longer than her CR-V, so I am a bit afraid for its well being.  C'est la vie.

So to get a jump on the project, I procured a heater box from my NH friend Peter who has a few vanagons he is parting out.  The following is the rebuilding of the box to be ready for the tearout.  I have also ordered a new wiper motor for the simple reason of mental ease that I did it when the dash was out.  I am hoping that the wiper arms are in good shape and can be lubed and re-used.


This was the box just after tearing it down.  It was one of the glued versions, rather than the clipped ones.  The difference being about an hours more work in separating the box, and then another hour preparing the surfaces again for putting back together.  The clipped ones come right apart after removing the clips.

As you can see, the heater core is pretty well gunked up, and that's the outside.  The clog keeping it from flowing is internal, and probably removed with some CLR, but I am not taking the chance.


Here is the new core and the original.  The older one is of really good craftsmanship, and the newer one not as much but still good stuff - made by Behr in the UK.

So I started tearing it down, removing the pieces, the flaps, the motor.  Once the flaps were out, I contemplated how I would rebuild those.  I stripped off the old deteriorated foam seals and was left with this to work with.

I wire brushed the best I could and was not satisfied, so I broke out the spot blaster and spent way too much time cleaning these up.  I really need to buy a sandblast cabinet.

Once the flaps were rust free to my acceptance, I cleaned them up with some paint prep solvent and spray painted them with some black paint I had on the shelf.  I hung them above my propane heater to cure up real well and went to work on the box itself.  The box was really dirty, dried dust from many years of use, but no mouse nests.  A toothbrush, air gun and some dried rags took care of the dirt.  A final wipe with some simple green and we are ready to go.

I deliberated for a bit on which way to go with the seal material, and determined that the synthetic felt used for window insulation would do nicely. 

This stuff stretches out perfectly, seals up nice and should hold up long time.

A few correctly placed slits down the middle allowed for perfect alignment and a quick pass with the lighter cleaned up the edge strands.

After doing this to all three flappers, I was ready to rebuild.  Reversing the process for installation, the flappers went in with a slathering of grease (because I did sand blast the arms), and got them working beautifully.  Some new stainless screws to ensure no deterioration down the road, and some one sticky sided foam  (1/2 in by 1/2 in) stuck to the periphery of the heater core to seal the spaces around the core and prevent rattling.


The picture was taken prior to cleaning the box with Simple Green, to test the foams ability to seal the gaps around the core.  You can see the tabs that were previously glued and now separated.  I cleaned them with a dremel to ensure a correct fitment when reassembling.

The felt seal installed with the stock mount clip bars, and in the housing.
Next part - the installation of the blower motor and reassembly.

And then he said - Let there be light!

When doing the radiator, I noticed the headlights had some water in them.


As you can see, they are H4 upgrades, but obviously done some time ago.  The seals had dried up and was allowing water to enter the bulb.


I tried to clean them up, and silicone them sealed.  Cleaning the lens was easy, but the backing of the bulb had a reflective coating that was wearing off, and my wiping off did not help.

Only one way to go - time for some new ones.

I procured a pair of new Hella H4's from a parts source and went to install a few days later.

Holy smokes, what a difference!

New cooling system

A few weeks ago, I was feeling the need to tinker one evening, and had the time to do so.  I went out to the Thingamajigger to find the stack of parts I have waiting for just such an occasion.

The impulse hit me to tackle the radiator job.  This was something I was holding off as I had recently tackled the radiator in the wife's CR-V and that was probably the single, largest pain in my ass I have ever encountered when doing a radiator.  EVERY bolt was rusted, or seized, the access was minimal and nothing went right.  The CR-V was 15 years newer than the Vanagon, and generally better maintained.

Crusty!


So, back to the Vanagon.  I had a new Behr radiator, had a bunch of hoses and clamps, temperature sensors, mount washers and gumption to get it done. 

The offending radiator is to the right.

Secure the front end of the vehicle high enough to have plenty of work space.  With my lowered van, the ramps were barely enough and I needed to do some manipulation to get it out.

The Vanagon holds some significant amounts of coolant, and it needs to be drained and disposed of properly.  Never reuse coolant.  Stuff is cheap, buy new coolant.  No sense putting all this money into the system and fill it with used coolant.
This radiator has spooked me since the get go, I must be looked upon by the Vanagon angels to have made it through the season without popping it.

It was susted thoroughly from the bottom, and is the original (or at least OEM unit).  The weight of this unit was easily double the weight of the Behr replacement unit.


The removal of the radiator was marked with a couple minor problems.  The first was the spring clips that hold the nuts to which the supports are held on.  The clips rusted enough so that the nuts themselves were spinning, and they needed to be cut off.  I replaced them with some body clips and stainless hardware.

The picture on the right shows the older ones and the replacements.

Once the support brackets were off, hoses disconnected, fan wires disconnected, the radiator can be lowered from the van.    Be cautious, the radiator surprised me with its weight.

When the radiator is out, you can start disassembly.  The shroud needs to come off with the fan unit. I took this opportunity to wire wheel the whole thing and give it a coat of paint.  If I had access to a sandblast cabinet, I would have used it here, but I do not right now.

New hardware, temperature sensor, and a spiffy coat of paint, the unit is ready to go back in.  Now to do some hoses.

The front two hoses are definites, the others are still under consideration.  Reasons for this is that I do not wish to simply slap in hoses to a motor that will be removed come tax season for an upgrade.
From the picture on the left, you can see my hose replacements for the two front hoses.

With the radiator out, it provides access to a whole bunch of stuff. I added some more soundproofing and got to replacing the heater lines while I had great access.

Since the system was drained, I used to opportunity to replace the heater lines.  I bought 30 feet of high grade heater line, some brass T's from Home Depot, crimp clamps and set to work.

I started from the rear while the fan shroud was drying completely.  Started with the feed line from the cylinder head and worked my way forward.  I replaced the lines going to the rear heater core and plugged into the brass T.  Make sure you get new grommets to protect your lines through the bulkhead.

I ran the other line from the return tube down to the T fitting and chose to run both of the lines forward together, as I thought this to be easier than running two single lines.  Seemed to work out okay.  Not a whole lot of access down there without stripping off half the undercarriage.

Then I worked my way forward to the front end.  I ran the new lines through undercarriage in the same location as the originals.  When I got to the front of  the van, and the smaller hoses that attach to the front heater core I wished I could have found replacements, but I have not yet been able to.

After connecting up the core and double checking all my hose clamps, I returned to the radiator installation.

The lifting of the radiator assy would have been easier with a second pair of hands as you need to juggle the placement of the radiator, the installation of two support brackets and insert the bolts.

I still need to get a couple new air diverters for around the radiator to direct air in the proper manner.  Connect up the radiator fan wiring, the temperature sender wiring and make sure the fresh air inlet is not full of gunk.

Now there are a few different schools of thought on filling the system with coolant.  I happen to have an incline on my second driveway that leads to my garage, so backing it onto the incline and filling there allows for an air free system.

My confusion started when I had a half gallon to go and the system was full.  Could not figure it out.

I took the van for a ride, figuring there was an air bubble that somehow did not get out.  Van ran great, temp gauge was fine, but while driving I tried the heaters and found that the front core (which was not attached to system when I bought it) was clogged and not allowing hot coolant through.  Now that's why I couldn't get that last half gallon in there.  Guess that is a project for another day.

17 December 2011

December already?

Holy smokes Batman.

Been on the road a bunch for work.  Have been tinkering, but not as much as I would like.

I have been accumulating parts on a massive rate.  Setting myself up for disappointment when I do not get all the projects done I fear, but I would rather have them around when I have time as opposed to having some time and no parts to play with.

First project will need to be the front suspension.  I have all the powerflex bushings, and new parts (tie rods, ball joints, radius arm parts, etc) to complete the job.  Only thing I still want is a set of control arms to have completely rebuilt prior to starting the job.  They are in the works from a local parts guy who is parting out some Vanagons.


Maybe I will get the control arms early in week and get them blasted and painted so they are ready to receive the bushings.