07 September 2011

Interior lighting - part two

Overhead console. 

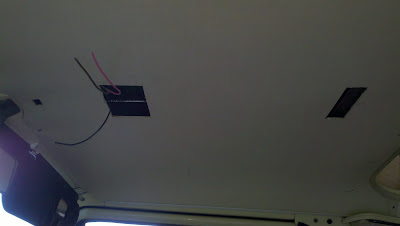
Finally getting along with this project.  While headliner was off for some maintenance and the insertion of the wiring for the rear overhead light, I laid the groundwork for the front console.

Wires placed, headliner laid out for the removal of the access holes (yeah, I did have some major reservations about cutting through a perfectly good headliner), I started cutting.  Three holes:

One for the rear mount 


One for the front mount

and one for relief access for the lighting part of the console.

Suspension finale?

Ok, so maybe not the finale but all the Weitec springs are installed with the Bilstein shocks.
Here is the skinny on the front ones. 


You do not need to have a compressor to do the front.  Even though my springs are smaller than stock, unless you have particularly large springs (like those on a Syncro) or lifted springs, you 'should' be able to do the install without a compressor. 


To the right, you will see the standard Vanagon front wheel suspension.  Stock spring, stock type shock, fairly untouched since it came off the line.  Amusing to see how much rust formed on the new calipers and rotors in a few months.

Anyway, you should be following along in your Bentley to grasp the whole process.  First, I jacked up the van, supported with a jackstand (very important) and removed the wheel.  The got in with my PB Blaster and squirted the shock bolts (upper and lower), upper ball joint bolts, radius arm nuts, and caliper bolts.  While you are waiting for it to do its magic, slide under and do the other side.  Then I started with the removal of the shock bolt on the bottom, then on top.  This side was a bitch, the sleeve that rests between the upper shock mount / sleeve had seized on.  It took a while to get it free so that I could reuse the shock mount again.

After removing the shock, I removed the caliper mount bolts and supported away from suspension assy.  The key to this process is getting everything possible out of the way.  I then removed the nut on the forward part of the radial arm.  This is the part that will restrict your space to be able to remove the old and insert your new spring.

Supporting the lower control arm with a floor jack, remove the two allen head screws that hold the upper ball joint in place and push away the upper control arm.  Slowly lower the jack to release pressure on the spring.  Pull the spindle assy away to provide room to work and slide out the spring. 

You may need to put some pressure on the lower arm to give extra space.  I did it by putting a 19mm wrench on the lower ball joint nut and pushing straight down.


The insertion was much simpler than the removal as my springs were a bit shorter than the stock ones.  Especially since one was broken.


Final stance numbers: front 14.5 both sides, 14.875-15 on rear.  Will check again after sitting for a few days to see what settling happens, but since the rear has been in for a couple months, I am happy there is no Westy lean to adjust for as of yet.

Did both sides in about 3 hours (plus an hour screwing around with the damn shock sleeve).  Even with the little man's "assistance".  Kid loves this camper, and I will allow him all the time he wants to tinker.


Not really a finale.  I have started accumulating all the parts to do a full rebuild to the front end.  Powerflex urethane bushings, all new ball joints and such, radius rod bushings and more.

EDIT-1 March 12- The real finale will be coming up shortly.  I know this is the largest draw to this blog to date and I aim to please.  I have accumulated all the parts to do a FULL rebuild of the front end, but my hold up has been over a sandblaster.  Once all the parts are out, I want to clean all the parts up, paint them with Imron, clean up the undercarriage on the front and reassemble it better than new.  Clean cars are easier to maintain, more fun to work on, and nicer to look at.

Now that I have a new sandblaster and a compressor that can handle it, once the weather cooperates I will get to work and take many pictures. I may try to procure a set of control arms and have them ready prior to disassembly, just for expediency's sake.

EDIT - 20 April 12 - Been focusing on the paintwork prep, but have bought a parts van to help with the front suspension pieces.  This way I can have the control arms pulled, sprayed and ready to go when I disassemble the Thingamajigger.

But I do have an opinion on the Weitec spring / Bilstein combo: I am going to try a Koni shock in front as I find the Bilstein too bouncy with the lowered spring.

03 September 2011

Rear door modifications


Installed a pull knob in the lower portion of the rear hatch today.  Also installed a matching handle in same location, this way I can easily open and close the door from the back of the van.

Used a commonly available stainless steel drawer knob that I drilled and tapped for a 10-24 rod.

The handle I found somewhere, and paid 12 bucks for it.  The inner panel is the plywood one I made a couple months ago fastened with stainless screws.

I removed the lock mechanism, and drilled and tapped the 'push' lever for the 10-24 rod.  Cleaned it out of metal shavings and re-lubed it.

I then cut a piece of 10-24 rod and bent it to emerge from a 3/8 hole I drilled in bottom most portion of door panel and door itself.

The lock striker impacts right smack dead upon a nut placed on end of the rod after threaded through the latch on the lock mechanism.


The picture is awkward as it is a small place to take a picture, but you get the idea.

Now I can open the rear hatch from inside the van if I need to get some air, or get out quickly.

Interior lighting - part one

Been camping too much - no time to blog.

Today, I did get some time to play instead of packing or unpacking from a trip.

The installation of a rear interior light was today's project.

First, I crafted a harness and slinked it in behind the small panel that backs up the shelf on the passenger side.  Three wires run within a sheath of heat shrink tubing which is run up through to interior light above the driver seat.  The wires are color matched to the rest of the car's harness, and does not match the light (oh well).

So the harness runs down the length of the car to the upper bed, runs up and over the fixed portion of the upper bed and beneath the mattress cover.  I was going to break out the router and make a channel for the wires to reside snugly, but decided against it after I laid my body across the bed and could not feel the wires through the mattress.

I measured out the headliner above the rear seat and marked off the center of the panel.  Then marked the center of the light to be 6 inches from the metal bar that crosses the passenger compartment.  Marked a relief area of 2 inches wide on ends, increasing to 3 inches in center, and 6 inches long to provide room for the directional lighting portions of the light.

Suppose I should show what the light looks like?

This is the light, without the directional portions installed so that I could repaint the piece to match the van's colors.  Cleaned well with bodyshop cleaner to remove any silicone residue, scuffed with a gentle pad to allow paint to adhere well.

Paint is a matte finish that I found at Lowe's.  Its pretty close to the real color in the van.  Not enough to have two pieces side by side, but since the closest part with same color is a couple feet away, this will pass.

After rebuilding the fixture, I went to work on drilling holes and jigsawing the panel.  This is what the hole looked like.

Wafer board cuts easy, but I would be lying if I said I was not concerned about my fat ass on the second floor.  Guess that is another reason to keep the weight below 190?

Actually I am not concerned, as it is such a small hole and I will be supporting from other side.

The light was installed with a couple 10-24's and loc nuts through a 6x8inch piece of heavy gauge sheet metal.  After centering perfectly, I used some 1/2 inch self drilling screws to fasten the sheet metal to the top of the bed support.  Obviously, I connected the wires to the fixture before fastening down the sheet metal using the white wiring as the power lead, the red wire connected to the ground tripped by the door switches and the the black wire connected to the ground on the van.  This ensures the directional lighting has power to the switches all the time, and the center light will only come on when the door opens. 

I also ran a harness across the headliner to the passenger side so that I can put a stock type light above the passenger seat.